This just in:
Well, I'm not actually asking about pesto, I'm asking about the molcajete. I found that many people were disappointed with trying to season theirs; maybe an inferior product that just gave up grit forever, maybe just for decoration? I'd have to buy one online (not too many molcajete stores around here)--so what do I look for and how do I season it?
Thanks for the great posts.
Chris
Always a pleasure, Chris!
Well, first and foremost, unless you’re in a big cosmopolitan city, you DO need to buy online. I did, mostly because that’s a ton easier and more efficient than traipsing all over Fo’t Wuth!
Secondly, know that molcajetes are made from dang near every kind of stone you can name, and they are not all created equally: If it’s real cheap and/or too good to be true, then it probably is: Safe to say that the cheaper rocks are more prone to never ending grit sloughing off, which we most certainly do not want. The best stuff, (So say my Mexican friends), is granite or basalt with a relatively low sand content. I bought a Granite model, made by Vasconia and sold through Amazon; I couldn't be happier with this guy; it has a great texture, is very sturdy, and cost about $30, which is right in the wheelhouse for decent stuff.
Now, as for the seasoning issue; a good molcajete will shed a bit of grit, because it is what it is, stone being ground with stone. A lousy one will shed lots and never stop, regardless of what you do; bottom line, avoid cheap, no-name stuff, ‘cause that is, as you noted, just for looks at best… That said, just like a good cast iron pan, seasoning a molcajete takes a loooooong time; this is why both tools are passed down through generations.
In any case, ya gotta start somewhere, so here’s what you do.
1. Immerse your new cool tool in water for 3 or 4 hours.
2. Pull ‘er out and let ‘er dry thoroughly.
3. Put ¼ cup of rice in the beast and grind until the rice is a molcajete-colored powder; stop when you get there and clear the rice dust out.
4. Combine a tablespoon each of garlic, rock salt, cumin and cilantro; grind all that into the molcajete and coat it thoroughly with the paste. Let that stuff sit in the molcajete for 6 to 8 hours in the fridge, then clean it out under cool running water.
5. Now go to town on your favorite recipe; if you got a good tool, you will not be eating grit and things are good to go. The rest of the seasoning happens over the weeks, months and years…
So, get out there and get you one, y'all!
Thursday, August 26, 2010

Pesto Power
Pesto Power
This just in! Hey E, you got a recipe for pesto to die for, (or kill for - that is, cut down the basil plants)?
OK, wrinkle: how about vegan, i.e. minus the Parmesan?
And, further from tradition, but more in line with folks that just can't afford $30 a pound pine nuts, how about with walnuts?
My pleasure, buddy; this one's right in my wheelhouse! When it comes to delicious, nothin’ tops simple and good; like a stripped down tomato sauce from primo fruit, a basic basil pesto is hard to beat. Keep in mind that ‘pesto’ stems from the verb pestâ, to pound, hence pesto can be made from many things other than basil. That said, ya gotta start somewhere and basil pesto is that place!
Classic Basil Pesto
1 well-packed cup of fresh basil leaves
¼ cup Parmigiano or Pecorino Romano cheese, fine grated
3 or 5 tablespoons olive oil
2 tablespoons pine nuts
1 small garlic clove, fine diced
Salt to taste
Basil requires gentle handling; it doesn’t care for being doused, so don’t if you don’t need to. Inspect your basil and brush clean of dirt, etc.
In a sauté pan on medium heat, toast pine nuts until they just start to turn golden brown. Don’t walk away during the process; nothing burns faster than nuts!
I use a molcajete for grinding stuff in lieu of a standard mortar and pestle; I like the rough granite texture and find that it gets ingredients to the consistency I like faster and more uniformly than any other hand grinder. Just as guacamole really needs to be made by hand in a molcajete to taste right, so pesto must be ground by hand!
Put basil, toasted nuts, and garlic into your molcajete and gently but firmly grind the ingredients against the wall of the vessel until you get a nice, uniform paste.
Add grated cheese and combine with a fork or spoon.
Add olive oil 1 tablespoon at a time until you reach the consistency you like; a little more or less is fine, do it the way you wanna eat it!
Add a little salt just to brighten and raise flavors and blend, not to make it salty!
Serve pesto right away, mixed with pasta of your choice, (It’s great with angel hair, or with tortellini, etc.
Recipe makes about a cup of finished pesto.
Options:
In keeping with Dennis’ request, a vegan alternative to traditional pesto, aka, a no-cheese version: I’d say a few tablespoons of miso would get you to a very decent alternative!
Now, once again, almost anything goes with a pesto; your main criteria are tastes you like and ingredients that will bind and stay together for service. You can use any nut or cheese you like, and I’d substitute at the same volume as the original recipe calls for.
I’ve done a mint/pecan/feta version that was fantastic, as a for instance. Also, sun dried tomato pesto is spectacular and a real treat; I’ve done that with fresh, (Soft), mozzarella with great success as well.
Bottom line, experiment in small batches and have some fun!
Wednesday, August 25, 2010
¡Posole!
For some reason, I woke in the mood for Posole, so I turned to my friends Del and Isabel, who know this stuff like nobody else I know – It is TO DIE FOR when done right, and this one’s right. I have tweaked the recipe very, very slightly, (just for a couple of process points, really), so you’re getting’ the real thing here, Del approved!
Del’s Posole Auténtico
Combine in a nice big pot and soak overnight;
2 cups posole, (dried hominy)
6 cups of water
If you can’t get dried hominy, substitute 4 cups of canned
Take 1 pound of pork shoulder and cut it into ½” cubes.
Place pork in a hot pan with enough olive oil to coat the bottom and brown the meat thoroughly. Remove the pork to a bowl.
reduce heat to medium-low and add to the pan;
1 small onion, fine diced.
Sweat the onions for about 5 minutes until they just start to get translucent.
What The… Moment: Sweating versus Sautéing.
What is sweating and why would we do that? And for that matter, why wouldn’t we just sauté?
Sweating is taking your food and cooking it briefly, covered over relatively low heat, as opposed to sautéing, which is cooking briefly, uncovered, over somewhat higher heat.
Sweating retains moisture from, in this case, the onions, because the covered pan traps the steam generated by cooking and drops it back onto the food, thereby concentrating flavors that would be lost by sautéing. When we sweat, we don’t want browning, we just want to get things loosened up and ready to do serious work down the line!
Add to the onions,
3 to 5 cloves of garlic, minced
Cover again and let cook for a few minutes more, just to incorporate everything.
Combine hominy and water with your pork and veggies in your big pot.
Add,
1 to 2 tablespoons of good quality chili powder, (Del recommends Pendery's Original or Top Hat).
Start with roughly ½ tablespoon, stir it into the mix and taste to see where you’re at; add more as you see fit.
Add,
1 teaspoon Mexican Oregano
Salt to taste, (Go easy here; a little goes a long way here – Use salt in this recipe just to brighten the flavors and the blend, not to make it salty!)
If you used dry posole, simmer on low heat for a couple of hours, until the kernels have popped open: With canned posole, 20-30 minutes should do the trick, assuming you really did brown your pork well!
Serve hot with a nice fresh salsa or pico de gallo.
Del says: “In some parts of Mexico it would be tradition to serve this with garnishes including chopped cilantro, limes, thinly sliced radishes, even shredded cabbage. I don't do any of that because I like it like it is.
If you can stand it, cooking one day and heating it back up and serving it the next is even better than right away but, at my house I'm lucky to get one bowl of leftover. I can't swear to the authenticity of this because every abuelita has her own version and they're all different: All I can say is that my very traditional Mexican mother-in-law approves of mine.”
I have wolfed down this wonderful stuff for years and I agree completely with the chef!
Options:
Some folks like to add tomato paste to the pork while browning, while others add canned tomatoes or sauce to the mix while simmering, but this is not in keeping with Del’s recipe; if you feel you need to, then do, but try it his way first!
Fresh or preserved chiles can be added to the mix; if fresh, chop into roughly ¼” dice and sweat with your onions and garlic, but watch the heat! If you use preserved, then reconstitute if dried or thaw if frozen and add to the mix while simmering – skin, seed and strip the membranes. Once again, Del chooses to have the chile and tomato influence introduced by a nice fresh salsa, and I agree!
Friday, August 20, 2010
Das Spaetzle
Reading the paper this morning, I saw an article on a local restaurant serving Pan Roasted Halibut with Dijon Spaetzle; I pretty much started drooling right off the bat… I was drinking coffee, hadn’t had breakfast, and didn’t have any Halibut, but I sure do have the basics for Spaetzle: There was no recipe in the article, but being a savory breakfast guy, I knew I could figure that one out and do it up, so I did, and here it is.
Spaetzle means "little sparrow," in German, which I guess is a take on the shape or size or… I dunno, anyway, I love it and hadn’t made or had it in years. Spaetzle is basically a little noodle that is most commonly served as a side, like spuds, but you can do all kinds of things to it, since its basic dough just begging for inspiration. They go great as a bed for something wonderful, (Like the article noted), or as a side; only limit is your imagination and larder.
My version came out great, so I’ll lay it on ya here. I think Spaetzle screams for cheese, personally; most of the German cheeses are white and lean toward the Swiss than cheddar, etc. I made some Queso Blanco last night, and decided to try that with these guys; they paired up wonderfully! ( I re-posted the queso recipe below as well.)
Note on the chives; I used 'em because we grow 'em and I love 'em, but you could use anything that pairs well with mustard; Rosemary, Shallot...
Dijon Spaetzle
4 large eggs
¾ cup whole milk
2 cups all purpose flour, (Not self-rising!)
4 tablespoons unsalted butter
3 tablespoons Dijon mustard
1 tablespoon chives, minced
Salt and Pepper to taste
Salt a pot of water until it tastes salty, (Kinda sea waterish) and bring to a boil.
Combine eggs, milk, mustard and chives and beat well. Add flour slowly but surely until you end up with a sticky batter, (More toward the pancake side than the dough side).
Spoon about half the batter into a sieve or colander with roughly ¼” holes. Take that to your pot of boiling water, take a spatula or pastry knife and gently scrape the batter through the holes.
Allow Spaetzle to boil for about 2 minutes, until it’s just al dente; remove from the water onto a clean plate.
Melt your butter in a sauté pan over medium-high heat. Toss in your Spaetzle and stir constantly so they butter thoroughly coats the noodles, and you just start to get a bit of golden brown in them.
Transfer Spaetzle to a serving plate, add salt and pepper and garnish with fresh parsley.
Queso Blanco:
One gallon whole milk
1/2 cup lime juice
Salt to taste
Heat the milk in a non-aluminum pot on medium-low heat for about 10 minutes or until it looks like it’s just about to boil (DON’T let it boil!); temperature should be 185 degrees.
Add lime juice. The curds will separate from the whey and the mixture will look grainy, kind of like you’ve just thrown a bunch of corn meal into a pot of skim milk. Simmer for a few minutes.
Pour contents into a cheesecloth-lined colander and let it drain thoroughly: To save the whey to make ricotta, put the colander over a pot.
Sprinkle the curds with salt; go saltier than you normally would; the salt will drain from the cheese as it dries. Now is the time to add any herbs, spices or chopped chiles if you like.
Gather the curds in the center of the cheesecloth and tie the ends; hang the cloth on the faucet to drain for a few hours, (At least four hours, overnight is better.
Refrigerated, it keeps about the same as fresh milk.
Thursday, August 19, 2010
Viva Tomate!
This just in: “Tomatoes are coming! You’ve written a lot about preserving, so how about some of your favorite fresh dishes as well as a thought or two on preserving tomatoes?”
It will be my great pleasure! I walked the tomatoes at Neighborhood Gardeners with Grant, and the smell is still fresh in my mind; to me, there’s nothing like the aroma of growing tomatoes that says ‘garden’ more. I envy y’all the amazing varieties you’re gonna enjoy, especially among the heirloom stuff that you’ll simply never, ever see in a store.
OK, so fresh stuff first:
With beautiful heirloom 'maters, (Southern for Tomato...), you’ve simply got to do a dish or two that lets the fruit speak; here's another fantastic amuse bouche.
Simply take a tomato or two of your favorite variety, slice them about ¼” thick, arrange on a plate, season with a little sea salt and a light drizzle of olive oil, and that is that – You don’t need anything more and this way, you really get to enjoy the depth and character of a truly good tomato!
Next comes sauce, because you simply must do this as well. This version is a take on a classic Pomarola, (Known over here as Marinara, this is how to really do it; nothing like the commercial crap out there…) There are a bunch of varieties, this is my take on a Sicilian style.
Salsa alla Pomarola
1 lb of tomatoes, blanched, cored, peeled and rough chopped (About ¾”)
4 or 5 sun dried tomatoes preserved in olive oil, (See below and make your own!)
5 or 6 cloves of garlic, minced
1 carrot, fine diced
1 celery stalk, fine diced
5 or 6 fresh basil leaves
Sauté garlic, carrot, and celery in olive oil until carrots are fork tender.
Add tomatoes, ½ cup white wine, 3 tblspns of olive oil and bring to a simmer.
Fine dice, grind or process your sun-dried tomatoes into a nice paste; add this to the simmering good stuff. Let the mix cook for 1 hour, covered.
Remove sauce from heat, and blend thoroughly, (Blender, food processor, or my personal fave, a stick blender, AKA boat motor)
Return blended sauce to heat, add 4 ounces of butter, and allow to simmer for about 15 minutes more.
Chiffenade your basil leaves, and grate some fresh Parmigiano, Pecorino Romano, or Asiago cheese.
Serve over angel hair pasta, garnished with fresh basil and cheese.
OK, how about a super simple, cool summer tomato dish?
Tomato – Avocado Salad
3 tomatoes, blanched, peeled, cored and diced
1 avocado, peeled and diced
1 small bulb Shallot, minced
Olive Oil
Salt and Pepper to taste
Combine tomato, avocado and shallot, mix gently in a non-reactive bowl. Add roughly 2 tablespoons of olive oil, and salt and pepper to taste. Serve straight up, or with toasted Italian or French bread, lightly brushed with a garlic clove.
How about another, since we’re on a string of 100+ degree days down here? This is my take on an Spanish favorite:
Gazpacho Andaluz (Cold Tomato Soup)
2 pounds tomatoes, roasted, peeled, and cored
1 clove of garlic
½ Lemon Cucumber, peeled and cored
½ red, orange, or yellow bell pepper, roasted and peeled
½ cup day old bread, diced ¼”
¼ cup Olive Oil
1 tablespoon balsamic vinegar
Salt and Pepper to taste
To roast your tomatoes and peppers, cut them in half, brush lightly with olive oil and put them on your grill or under a broiler until the skins start to blacken; pull ‘em out and let ‘em cool before prepping further.
Put the whole shebang in a blender or food processor, (Or have at it with the boat motor) until everything is smoothly blended. Place in a non-reactive bowl or container and refrigerate for at least 3 hours.
Serve with a dollop of plain yogurt in the middle of a cup or bowl of soup, and a nice piece of bread to wipe it all up with!
And finally, tomato desert, you ask? Absolutely… Keep in mind, technically, tomatoes are fruit, not vegetables, and as such, they make fine deserts indeed!
Tomato Granita
2 pounds tomatoes of your choice, (Naturally, go for something nice and sweet!)
1.5 tablespoons fresh lime juice, (FRESH, NOT bottled!)
¼ cup fresh cilantro
salt
Optional: For a version with zing, add a moderately hot chile of your choice, blanched, peeled and veined.
Blanch all your ‘maters, then peel ‘em and put everything into a blender, food processor, or have at ‘em with the boat motor.
After blending, run the mixture through a chinoise or strainer, (A chinoise, the conical metal strainer, is really perfect for this kind of thing and super handy for canning and preserving; get one.)
Pour your strained mixture into a glass baking dish big enough to allow the layer to be roughly ½” thick or so.
Set the dish on your freezer for around an hour, or until the mix looks frozen around the edges. Use a fork or small spatula to scrape all the icy part into the middle of the dish, then let it freeze some more. Keep repeating this cycle about every half hour or so until everything is frozen evenly.
Serve in a martini glass with a little sprig of mint.
You can easily prepare Granita the day before as well!
So, preserving, eh?
Well, here again, my favorites are canning and drying.
As for canning, while traditionally tomatoes are done via the hot water method due to their relatively high acidity, I think that pressure canning yields better and more intense flavor; also, if you’re canning tomato-based sauce, you really do need to pressure can for your safety.
There are lots of canned tomato recipes out there, so I won’t go into specifics about that, other than to say that you should certainly can tomatoes in your favorite styles; if you like the Pomarola, make a bunch and can it. I like to use several versions of tomatoes when I cook; sometimes I want whole, sometimes crushed, sometimes sauce, sometimes puree – If that’s the case for you, too, then can all your favorite versions and, this winter, enjoy a level of taste and quality no store will ever, ever touch!
Drying:
Sun dried tomatoes are a huge treat; nothing but the sun adds such intense flavor in them!
Slice your favorites ¼” thick and lay them out to dry, (Or use a dehydrator, if you must.) Dried tomato flake is a wonderful thing to have in your spice cabinet, so cut those slices into roughly ¾” pieces and dry those – You can add them to soups, stews, eggs, all kinds of things. Quarter or half your favorite variety, dry them and then preserve those in olive oil; they’re unbelievable on pizza, or with smoked chicken, basil and mozzarella cheese in a grilled sandwich. Finally, put dried tomatoes into a coffee grinder, (Do you have one of these just for spice? NO? GET ONE!! You can find used grinders for a couple of bucks at a second hand place; I keep two around just for spices – We all know that spice lasts longer and tastes better if kept whole; store yours this way and grind what you need when you need it; you get better flavor, longer lasting spice, and lower cost to boot.) Anyway, back to those tomatoes…. Grind them into powder, and you can add that to soup, stew, or to biscuit, pasta, pizza or tortilla dough for a fantastic flavor and a very cool look too!
This weeks other mail bag question: "you wrote about not using table salt for canning, what about for cooking? I see a lot of salts out there, is there really any difference?"
Short answer; ye Gods, YES! Excellent question and thank you for not letting me gloss over this; let's talk about salt and pepper, since they're the main go-to seasonings.
One of the main things about good restaurant food, or great restaurant food versus yours, maybe, is the nature and quality of seasoning. Great chefs don't need nor use 14 things in one dish; they use 1 to maybe 4 or 5 max. The idea of seasoning is to enhance flavor, not overcome or mask it. Salt is incredibly versatile and absolutely necessary in cooking as far as I am concerned, and pepper runs a close second.
Notice that even in relatively sweet dishes, like the roasted corn salsa we made a while back, there is salt; this is because it definitely enhances flavor when used properly, and by used properly, I mean not overused!
That said, what salt you use matters a great deal. Treat salt no differently than any other ingredient; in other words, would you settle for a lousy cut of beef or veggies that weren't fresh as you can get 'em? No, of course not, so don't settle for sub-par seasonings either! Plain ol' table salt is crap - NO flavor, treated with iodine, and terrible for seasoning and cooking. The bottom line is, If I have to buy salt from the grocery, I get either untreated sea or Kosher salt and so should you; read your labels so you know what's really in there! I use good quality salt from a known source with nothing but salt in it; (Even Morton Kosher salt has prussiate of soda in it as an anti-caking agent; I neither need nor want that in my food, frankly...).
OK, on to the second part of the question, regarding the varieties out there and whether they're worth it or not: Short answer, you betcha! I just went and counted, and I have 11, count 'em 11 varieties of salt in my pantry, including; curing, kosher, a couple varieties of smoked, (Alder and Mesquite), sea salt, sel de mer, Janes, Utah Basin, Murray River Flake, Hawaiian, and Black. Each and every one has a completely unique flavor profile that lends itself to certain styles and genres of cooking. For me, it's a requirement; you don't probably need that many, but two or three really good salts will serve you well and make your food taste that much better.
Similarly, plain ol' black I-don't-have-a-clue-where-it's-from-or-what-variety-it-is pepper is junk. Pepper is a great baseline spice to add a little bit of zing to a dish without getting overboard or exotic; to me, good pepper is a must-have in, once again, more than one variety. Malabar or Tellicherry are great black peppers, with genuine flavor and consistent quality. That said, green, red, and white pepper have completely unique tastes that will go better with some things than black does. Our every day pepper here is a hand blended mix of all those colors and adds a really nice note to food. Once again, don't buy it from the store; they may have it, but for what they charge for a tiny jar, you can and should buy a pound of good stuff online.
We'll get into broad seasonings later on, but for now, suffice it to say that most of what you can get from the average grocery is crap and not worth your money. For dependable quality, you either have to go local with someone you know and trust, or buy online. Butcher and Packer and World Spice are tremendous spice resources; the quality is the best you'll find anywhere, and the prices are seriously good; check them both out.
Friday, August 13, 2010
¡Save The Chiles!
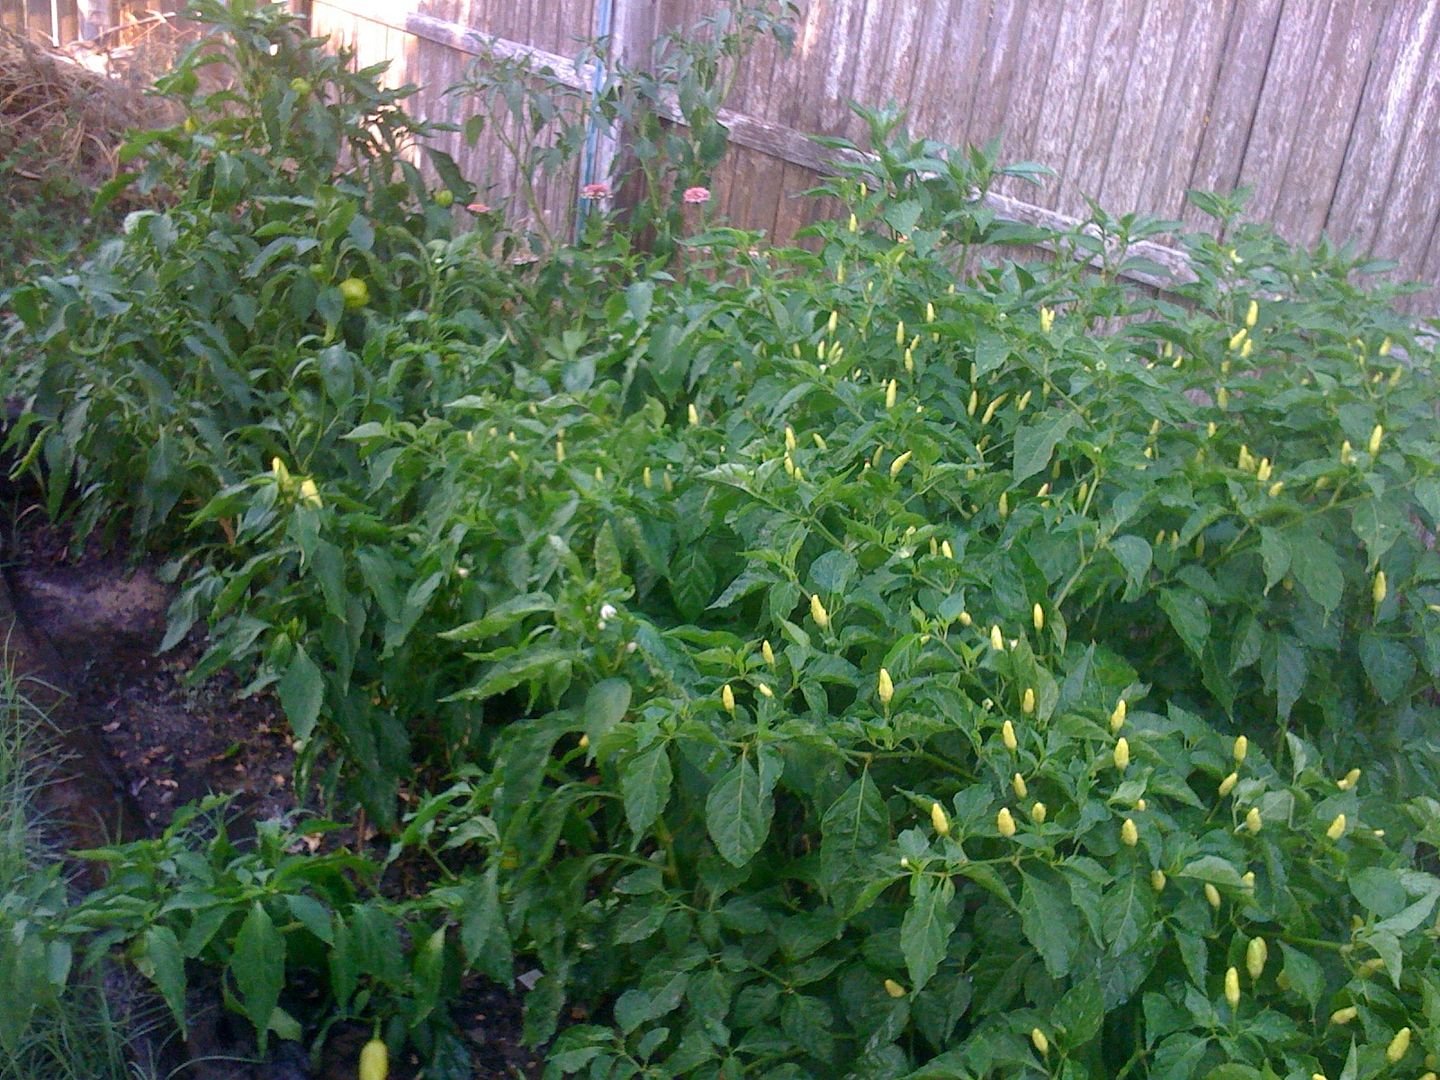
Out watering this morning, and I know, since our peppers are very happy, that yours are too! So time for some thoughts on chile preservation. If you get lots of chiles and peppers, (And if you can, you should, plain and simple), you need to think about preserving them. Here again, two time honored methods come into play; drying and canning.
Canning Chiles:
General Notes:
1. If you don’t have canning equipment, ask around, check Craigs list, etc; even in the 21st century, lots of folks have them and of those, most don’t use them!
2. When canning, use good quality cooking or canning salt ONLY, NEVER table salt; table salt is most often iodized and will turn your stuff black and make it taste funky!
3. Best canning vinegar is white, because it does the job and doesn’t add color; be careful with cider or balsamic or anything with color in it, unless you maybe want some, ahhh, unusual color results…
4. ALWAYS practice safe canning; follow sterilization routines to the letter and without fail, each and every time!
5. Always leave enough headspace in your canning jars; 1” for low acid foods like chiles, ½” for high acid fruits and tomatoes, ¼” for jams and jellies and whatnot.
When canning chiles, you have the option of pickling or not; that said, doing them up fresh is gonna require pressure canning capability. Let me say that again; if you choose not to, you MUST pressure can your chiles. Chiles are not a high-acid food, (Like tomatoes for instance), so there are many more opportunities for bacteria to grow in the canned product. If you like your chiles as they are and have the ability to pressure can, then DO, ‘cause this is the best way to preserve great chile taste long-term. If you want to add a little salt for taste ¼ tspn per pint is plenty.
You certainly can roast your chiles and can them that way as well, they are wonderful in cold weather favorites like enchiladas, soups, chili and lots of other things as well.
In all options for canning, pick your best, freshest chiles for the show. Discolored or bruised chiles will likely make mushy canned chiles, and nobody wants that…
Follow the guidelines for your pressure canner, but in general, fresh processed chiles need to reach an internal temp of 240º F and maintain a boil for at least 10 minutes below 1000 ft. in altitude, (Which I believe y’all are all a bit above); add another minute to the boil for each additional 1000 ft.
If you decide to pickle, I strongly recommend brining them overnight. This will help keep them crisp and to maintain their best color. A brine solution of 3 parts water to 1 part salt works well. I use a 5 gallon food-grade bucket and cover it tightly for the process. Make sure you rinse your chiles thoroughly before processing, (As in several times, until they neither feel, smell nor taste salty!)
Also, prick your chiles with a pin before canning, so they don’t collapse on ya.
Here’s a few of my fave variations on the theme for y’all:
Pickled Jalapenos
We LOVE Jalapenos; they are, in fact, our go-to chile here. We use 'em in eggs, salads, almost everything. Good ones have a mild bite and a fresh chile taste that lends it self well to many, many dishes.
1 lb of fresh jalapenos, whole, pricked
Have prepared the following:
¼ cup rough chopped onion
1 cinnamon stick, busted into pieces
2 tbspns mustard seed
2 tspns whole allspice
2 tbspns whole peppercorns
1 tspn whole clove
2 tspns dill seed
2 tspns whole coriander seed
2 tspns whole mace
6 – 8 whole bay leaves, busted into pieces
Optional: 1/4 to 1/2 clove peeled garlic per jar
(Note: This is a good, general purpose pickling mix for dang near anything!)
Prepare a brine solution as follows:
3 tbspns sugar
9 tbspns salt
2 pints water
2 pints 5% vinegar
Toss jalapenos in water at a rolling boil and blanch for a couple minutes, (See below on Blanching!)
Your chiles must be hot when you brine them, so take them right from the blanch and stuff them into jars – not too packed but not too loose; they will lose some volume during processing, so err to the side of full, but leave at least ¾” headroom in each jar.
Divide your pickling spice up by number of jars and spoon even amounts into each, (Just scale your recipe up or back as needed for more or less spice).
Bring the brine to a boil and then carefully pour it into each jar. You want to leave a good 1” of headspace in these jars, it’s very important!
Process for 12 minutes and then set out to cool. These are best if left for at least a month to get acquainted before eating.
Pickled California or Garden Mix
Prepare by cutting into roughly 1” to 2” pieces and chunks:
Cauliflower
Chiles of your choice, (Careful, remember heat guidelines!)
Carrots
Celery
Bell Peppers
Cucumber
Small garlic cloves, peeled and halved, (½ to 1 per jar)
Use pickling mix and process as shown above and go wild!
Drying Chiles:
Ever had killer Molé, that food of the Gods from south of the border? IN some of the legendary red and black Molés, say from Oaxaca, might have anywhere from 20 to over 40 ingredients, and you know what the real key to them is, the Corazon? Dried chiles, and that’s no lie. Ancho, Pasilla, Mulato, Chipotle, Guajillo, Costeño, all those famous and mysterious chile names; know what they are? Various forms of dried and sometimes smoked chiles, and that’s a fact. Ancho and Mulato are dried Poblanos, which y’all have, and Pasilla is a dried Chilaca: These three dried chiles are kind of the Big Three for Molés, and you can and should make them yourselves!
Drying chiles ain’t hard, but to get really good, consistent results that will last, taste, smell and look best, I really think you need a food dehydrator. Let’s face it; humidity isn’t something we can control outdoors, or inside all that well. In a pinch, you can use an oven, but it’s really too hot, even on warm. I know folks who have done homemade rigs using light bulbs, but I have safety concerns about that: Fortunately, dehydrators are cheap and also happen to be another thing that many folks have and few use; you should be able to snag a used one quite easily.
To simply dry chiles, set them out with plenty of air space all around and let them dry thoroughly and completely. We have an early rush of Tabasco peppers this year, so I dried a bunch the other day; the smell is outta this world!
To add smoke to dried chiles, I smoke them prior to drying, which you can do too. I have a smoker, of course, (That and a tiny rat dog are required for Texas residency, FYI), so I use that most often. I also have some very high quality smoke powder, made from nothing but water and wood smoke run through it, that I use when I don’t want to smoke, (Like now, when it’s 106 outside, fer instance). I’ll rub the chiles with a little olive oil and sprinkle or roll smoke powder on ‘em, and then dehydrate and there ya go!
Question o’ de Day: What is blanching and why do I care about it?
Great question! ;-)
Blanching is the process of plunging stuff into boiling water, (And sometimes steam), very quickly, after which you pluck ‘em out and stuff ‘em under an ice water bath; yes, it is that simple!
The process of blanching is used for several reasons, most importantly that this simple little trick enhances flavor, color and texture of veggies and fruit like nobody’s business: This IS one of those little restaurant tricks that pays big dividends and is super easy to do: Ever been at a nice place and noted how great their simple veggies taste and look and smell so much better than yours at home? Now you know a big reason why…
Blanching also makes peeling a bunch easier for things like tomatoes, peaches, or really annoying stuff like Fava Beans.
Blanching is considered a must-do step in good restaurants prior to serving veggies as a crudité, (Fancy French word for raw veggies served, sliced or whole, as a nice, simple meal course, with a little salt, butter, olive oil, vinaigrette, etc), or if they are to be used later for various dishes, or stored for any length of time.
Blanching and peeling is a great way to treat fruit and veggies that DON’T come from NG or KG, that maybe have been treated with various crap we don’t really wanna eat, capiche? Even if we are working with great veggies or fruit form the gang, blanching and peeling, (When called for), is the way to prepare stuff for freezing: Blanching kills bacteria and also slows down the enzymes that cause stuff to go bad. When blanching to freeze, put a little salt in the blanching water to help further preserve color, flavor and crispness.
Blanching also comes into play when prepping a bunch of things that are gonna go together in a dish, like for a stir fry or pasta dish. Blanching helps the constituents stay crisp and pretty, and don’t get mushed out or lost in other flavors once they’re combined.
Finally, taking the boiling a bit further, we can parboil stuff, (AKA, partially cooked), which speeds up and/or equalizes cooking time for disparate components in a dish; there’s another restaurant secret for ya. This is how stuff like carrots and diced onions come out ‘perfect’ and at the same level of doneness when cooked together.
Big Finale To Bring Everything Together:
Quite a few chiles freeze really well, so don't discount this method for long-term storage; Every year down here, we get Hatch chiles from New Mexico about this time of year. I split mine between canning, drying and freezing, with the majority roasted. They are the core of winter chile sauces for me, and the frozen ones lend themselves perfectly to a quick menu selection.
While with the roasted chiles, I prefer to leave the skins on for flavor and remove them after thawing, for plain ol' chiles, you're best plan is to blanch 'em, skin 'em and freeze away. Here again, glass is way better than plastic!
Great Dinner, Gang!
This just in from Christie!
Hi Eben! Great post on cookware, etc. Your knowledge is amazing, but we knew that :)
Last evening, while dodging raindrops, we had our CSA get-together featuring yummy CSA veggies. Food ranged from Lissa's pesto cheesecake through my tabbouleh and focaccia pizza, with stops along the way for lots of other goodies (including a version of your cuke, onion, and pepper salad) and ending with apple pudding! We had great fun and are looking forward to having you and Monica join us next year.
We were asked for some recipes, so here's my tabbouleh. When I make tabbouleh I don't measure, so I am trying to approximate the taste. I am generally heavy on lemon, but tried to use a light hand on last night's fare.
Christie's Tabbouleh Salad
This is, essentially, a parsley salad. So you can't go overboard on the parsley. I generally use flat/Italian parsley (Us Greeks DON"T credit it to the Italians), augmented with curly parsley to give a bit more "fluff" and texture.
2/3 c Bulgar--found at co-ops--in supermarkets around here Red Mill brand is good
2 c chopped parsley, minimum
1/2-1 c chopped tomatoes
3/4 c olive oil
1/2 c fresh squeezed lemon juice, (more to taste)
1 c or so chopped green onions (both white and green parts)
chopped mint to taste
salt and pepper to taste, (Careful here; taste first!)
Soak Bulgar for an hour or two. Cover with water and add more if needed. Bulgar is already cooked, so all it needs is soaking. Check to see that it is soft all the way through and then drain off any excess water. Mix with other ingredients and adjust to your taste. I usually add some chopped mint--apple and spearmint are good. Don't overdo it. Add just enough for the exploring palate to detect, but not enough so you say, "Wow, lotsa mint!" Sometimes I have been known to add crumbled feta cheese. Like many salads with an acid and oil dressing, this gets better after sitting for a day.
Notes: Do not used bottled lemon juice. Even the better stuff not- from-concentrate just isn't the same. You need to squeeze those lemons to get juice with the right taste.
Bulgar is not the same as cracked wheat, so if you shop at a co-op where they may carry both, be sure to get the stuff labeled Bulgar, (Or whatever the spelling). Cracked wheat is crushed wheat grains and it is not parboiled.
Since this is a parsley salad, it should basically look green--not red (too many tomatoes), or beige (too much Bulgar). That said, this salad can be made in just about any proportions that suit your taste buds. In addition, you can also make it with a base of orzo or couscous (both pastas) instead of the Bulgar. That will give you a different texture, of course.
Bulgar is very versatile. You can use it in lots of things, and all you have to do is let it soak while you are doing other stuff. It is a very healthy alternative to rice. Just soak, heat in the micro, and use wherever you would use rice. It has a slightly nutty taste compared to rice.
Eben's P.S. - Flattery will get y'all everywhere! ;-)
And FYI, I never measure either, (It's true, ask M!), so all my recipes are converted for sharing - If that's how you cook too, do what Christie did and approximate to the reasonable side for spice and whatnot. This one sounds great for summer, I'm doin' some up!
Thursday, August 12, 2010
NGKG Chef Q & A
Well, I have made an effort to encourage questions, ‘cause I really do want them, so I sure am not gonna pass any up!
PLEASE DO ask questions, comments, offer suggestions, etc! At the bottom of each post in the blog, you’ll see a little bar that separates the post from the last one; kinda in the middle of that there’s a little line that reads ‘comments’; just click on that to ask a question, make a point or comment, etc: A new window will pop up and you can enter your question there. It may ask if you want to follow the blog and the answer is, of course you do! Following the blog means you get notified when new posts are up, etc.
You can also email me; ebena at sbcglobal dot net, (Do that up in typical email format; I just spelled it out here to avoid spam mail...) OK, so down the river!
Got an email that reads “I keep seeing you use the term “Non-reactive pan” or bowl. What exactly does that mean and why do I care?”
That’s a great question, (And a great reminder not to throw cook-speak around too much, Eben!)
A non-reactive bowl or pan is simply one made of stuff that food won’t react with chemically: Aluminum, copper, brass, cast iron, and plastic should all be considered potentially reactive. At issue isn’t the pan or bowl itself so much as it is what you’re putting inside of them: When cooking with high acid foods, like citrus, tomatoes, vinegar and the like, those foods can react with pans and bowls and leave an off taste in your mouth. There is also some discussion to the effect that aluminum, non-stick, and plastic containers can in fact present health hazards simply by their use, so let's take a look at that stuff.
When high acid foods are cooked in aluminum, certain aluminum salts can form, and there is some evidence that these salts can lead to dementia and impaired vision; in any case, we don’t want to be ingesting them if we can avoid it, right?
Likewise, food wrapped in plastic or placed in plastic containers has potential problems. Fatty foods like meat and cheese can promote the leaching of diethylhexyl adipate from such films and containers; you may have gotten an email to that effect from a well meaning friend. While the FDA claims that the amount of this chemical we’re exposed to is within safe parameters, I say unto you again, is this really something we want in our food and bodies?
Long and drawn out answer; no.
Quick and dirty nonstick Q & A; is nonstick OK for the kitchen? Answer; if you’re really getting health and environment conscious, no. The most commonly used non stick coating is PTFE, the exact same stuff you find in plumber’s tape; do we really wanna eat that? No. The stuff is applied as fluorocarbon layers to pans; remember the ozone layer? Heating nonstick pans can breakdown flouropolymers into such wonderful things as:
Triflouroacetate, (Harms plants and takes decades to break down)
Polyflourocarboxylic acids, (Removed from Scotchguard ‘cause it’s bad for us).
CFCs, (Ozone layer again).
‘Nuff said? Yeah, I think so…
Do yourself and your world a favor and stick to stainless steel and cast iron cookware, glass and stainless bowls, and glass storage containers. Your body and the environment will thank you, big time!
OK, next question:
“I love the blog, but I can cook too! Can I submit recipes and suggestions?”
Answer: YES, and please do! Sharing and learning is what this is all about! We ain’t the end all to be all of food, just one resource among many, so bring it on!
Tuesday, August 10, 2010
Massive Cuke Attack!
Hey, y'all;
Got great feedback from the Storology post, including this one:
"Eben,
This is John from King Gardens. Thanks for storology 101--good info for folks who are used to veggies lasting like Twinkies because of preservative sprays. Now that you've established yourself as an authority, any suggestions on what to do with the wheel borrow load of cucumbers I just picked?? Would send you a picture if I could figure out how to attach it. Some of them are destined for our CSA dinner tomorrow night. Our subscribers will get a full array of veggies, plus pesto cheese cake, Christy's bread, and possible a beverage or two. Will definitely schedule around your availability next year! Thanks much for doing this blog!
John"
Well, shoot, BIG thanks, first and foremost, John; it is my pleasure, believe me! And it would be a gas to do some live stuff next year, count on us bein' there, for sure!
OK, well, THE number one way to preserve Cukes is... Pickles of course! If you can do pickles, you MUST do 'em, 'cause we all know there's nothin' better. In fact, pickin' my tiny brain, I cannot think of any other long-term preservation scheme other/better than pickles, so... Pickles it IS!! I don't know about y'all, but we LOVE 'em; our fridge always contains 4 or 5 varieties and often more; garlic dills, sweet, sweet & sour, hot, etc, etc - So I say if you're blessed with the best rough stock there is, make 'em happen!!
As for fresh stuff for the CSA dinner, consider the following:
Cucumber/Tomato/Basil salad: 1 to 1 to 1/2, w/ balsamic vinaigrette.
Cucumber Salad: Just cukes, onions, a little parsley or cilantro, oil & vinegar.
Fresh Cuke Pico: Add tomatoes, onions, peppers, chiles and...
Cuke-Mango Salsa: 3 to 1 Mango to Cuke, add jalapeno, onion, cilantro, garlic, lime juice, salt and pepper...
Cuke salad: 5 parts cukes, 1 part onion and bell peppers, salt, pepper, olive oil & vinegar to taste.
Bet some or all of those would float yer boats, eh?
CHEERS!!
Urb
Monday, August 9, 2010
Storology 101
It has been brought to the Chef’s attention that some of y’all might like a few words on care and storage of produce and herbs and such; here goes…
Ok, first and foremost, as you should know, your veggies from The Neighborhood and King’s gardens comes to you without pesticides or herbicides on them; that said, all you really need to do upon receiving them is a quick rinse and inspection for bugs and dirt. The best way to wash veggies is The Restaurant Way; fill a sink with cool water and dunk stuff while agitating gently; this allows dirt and such to fall to the bottom, leaving your goodies nice and clean. Lift your bounty out of the water and dry gently on cloth or paper towels.
Most nice, fresh veggies really don't care for the fridge, truth be told: Hardier stuff and the most delicate will do fine there; carrots, celery, lettuce and such, but onions and tomatoes and potatoes don't really like it there and will suffer in relatively short order. It is always best policy, when getting beautiful fresh produce like you are, to use as much as possible right away, and properly store or preserve anything left over. With produce, we're generally talking about drying and canning as best storage process; if you're gonna get great stuff, why not make it available all year 'round, right? Face it, our not-too-distant ancestors spent a lot of time canning and preserving, and we'd all do well to learn from that. If you're getting this wonderful stuff, you obviously enjoy great food, so if you don't have the ability to can and dry properly, get it and use it; you'll thank yourself profusely come January or so...
Herbs will store best if left dry, so don’t wash those until you’re ready to use them. Most herbs will do well in about 40 to 45 degrees; if you are blessed with a cool cellar or basement, take advantage of that; if not, and your fridge has a decent crisper, then store your herbs in a clean container, (We use glass, to avoid excess plastic and for taste). Herbs stored thus should be fine for about a week or so; any longer than that and taste and appearance are gonna suffer!
At all cost, avoid cold spots in your fridge if you store this way! Some of our fave herbs, such as basil, (And lemon verbena), don’t like cold at all and will turn black below 40 degrees! The hardier varieties, like parsley, sage, rosemary and thyme, (Hey, there might just be a song there…), will do fine for a couple weeks, but again, the more delicate ones will definitely not do so well.
Herbs kept dry don’t really need to vent, and will do great in airtight conditions; if yours are wet, then the special veggie bags or containers with air valves will do best. I know some folks like the wrap-it-in-wet-paper-towel concept, but truth be told, it will rob flavor and invite spoilage. Since Monica and I are blessed with fresh herbs out back almost year ‘round, we do use the stand ‘em up in a glass container of water method, and you can too, but only if you’re sure you’re gonna use those guys within two or three days; much more than that and things will get funky, even if you change the water.
Of course for long-term, (AKA over winter) storage, nothing beats drying of herbs and even your favorite produce. Home driers are cheap and do a decent job, and will allow you to enjoy your favorites right through the Dark Ages. As a for instance, we use some of our chiles that are coming ripe now, and dry some for later – The drying process makes your house smell great too! Store dried herbs in air tight glass containers for best results and do not chill or freeze; they’ll be happier at room temp in a nice clean jar. Try drying onions, cilantro, and tomatoes as well as peppers and chiles; they’re a real treat later on! All your herbs can be dried easily; field strip your stuff down the to the form you want for use, (i.e., remove Rosemary, Thyme, Sage, Cilantro or Mint leaves from stems, check them for bugs and dirt, and then go ahead and dry ‘em up.
Nothing in the world beats fresh herbs for great cooking, but in the dead of winter, believe you me; the difference between herbs you’ve chosen and preserved yourself and the crap that comes on a grocery store shelf is night and day – You’ll be super happy with the results, and you’ll get that nice little flash of memory back to the summer days when you made it all happen, too!
Thursday, August 5, 2010
Holy CRUD!
Just made my fave breakfast, a couple eggs with cilantro, onions, tomatoes and chiles on top, and...
HOLY CRUD!!
Got surprised by a chile, because I didn't check carefully enough prior to cooking with them, like I told y'all to do! Ten minutes later and I am still sweating profusely...
Before cooking with them, I bit the end off of one and tasted it - Not hot, so off I went - NOT a smart game plan; I love heat, but when it's so hot you can't taste or eat comfortably, it's TOO hot!
So, a couple more points about chiles:
Tasting for heat: The very end is gonna have the least amount of heat; it's farthest from the membrane and seeds, so, duh, Eben, not a good test. Chopping off the top, wiping a finger over the seeds and touching that to your lip will tell you what you got.
Respect the variety: What I used this am was a Serrano; they ARE generally hot, so I should have expected hot, and not been fooled by a bad test.
Field Strip 'em: Membranes and seeds out, plain and simple!
Sweeten their temper: Soak field stripped chiles in a bath of 2 tblspns sugar dissolved in 2 cups of water; it won't impact the taste profile much and it does help chill 'em out a tad.
If all else fails: Do what I did, pick the little buggers out, add some sour cream and mild tomato salsa, and let those help cool things off.
Oh, and bring lots of paper towels to the table with ya...
Tuesday, August 3, 2010
Classic Bruschetta
OK, well tomatoes are coming, and I have seen the variety and tasted the quality, so y'all are up for some wonderful treats! We'll start into tomato dishes with a classic Bruschetta, perfect for a summer evening.
Classic Tomato Bruschetta
3 or 4 ripe tomatoes of your choice
1 to 2 cloves of garlic, minced
2 tblspns extra virgin olive oil
1 tblspns balsamic vinegar
3 or 4 leaves fresh basil, chiffonade cut
Salt and pepper to taste
To chiffonade:
Stack your leaves so they're all lined up the same way. Now roll the leaves into a nice, tightly rolled bundle. Start at one end with a sharp parking knife and make cuts clean through the roll, about 1/8" apart - The tighter the roll, the finer your cut - You can go thinner than an 1/8" as you see fit!
1 loaf of Focaccia, Ciabatta, or French bread
scald your tomatoes by dropping them in water that you've just brought to a boil and then removed from the heat. Let 'em sit for about a minute and then pull 'em out and pat 'em dry. use the edge of a paring knife to peel the skins off the 'maters.
After you've skinned 'em, cut the tomatoes into quarters and remove the centers and seeds. Now cut your bounty into a rough 1/4" dice.
Combine the minced garlic, olive oil, balsamic vinegar, and basil in a non-reactive bowl, toss to coat everything thoroughly, cover and let sit in the fridge for 30 minutes.
Slice your bread into nice, grab-able slices and arrange on a cookie sheet. Brush each slice lightly with extra virgin olive oil and put 'em under your oven broiler until golden brown.
Keep the bread and bruschetta separate, so that folks can spoon up their own, and to keep the bread from gettin' soggy.
Serve with a nice, cool bottle of white wine and enjoy!
Monday, August 2, 2010
Say HELLO!!!
Hello, world!! May I have the pleasure of introducing Ivy Skar, our blue eyed, tow headed very first granddaughter!!!
YEAH!!
E & M
YEAH!!
E & M
Gotta have Tzatziki!
If you've never had Tzatziki sauce before, we've got a real treat in store for you! Here is one of the finest uses for cucumber and a wonderful, cool sauce for summer dishes. In Greek restaurants, its often served with lamb, but I'm here to tell y'all that Tzatziki is excellent on eggs, fantastic on flat bread, pleasant on poultry, and beautiful on burgers; in other words, like hot sauce, it's good on durn near everything!
Classic Tzatziki Sauce
1 8 oz container of Greek Yogurt, (You can use regular too)
1 med cucumber
2 tbspn olive oil
Juice from 1/2 to 3/4 lemon, (Your taste)
1 tspn dill, chopped fine, (You can also use mint instead)
2 cloves of garlic, minced
salt to taste
Line a colander or strainer with paper towel and drain your yogurt for around 30 minutes, (Critical step to avoid runny Tzatziki).
Peel, seed and grate cucumber.
Combine everything and mix well by hand, (Blending or processing makes your yogurt break down).
Place in a non-metallic bowl and refrigerate, covered for 2 hours.
Serve chilled
For a first taste, try it with lightly toasted pita bread and a little crumbled feta cheese - εύγευστος! (Delicious!)
Enjoy!
Sunday, August 1, 2010
Great Summer Salad
We're enjoying Reuben sandwiches tonight with homemade pastrami and homemade thousand island dressing. They're great, but you really want a nice light salad as a counterpoint, and to help break up the heavier flavors of the sandwich. Here's what Monica came up with. For the record, we used lemon cukes and roma tomatoes from our garden; y'all use whatever the gang provides that floats your boats!
Cucumber Tomato Salad
For the salad, prep and combine in a non-metallic bowl:
2 Med. cucumbers; peeled, seeded and sliced thin.
1 large tomato; cored, seeded and 1/4" diced
1 tspn minced shallot
1/4 cup chopped garlic chives
Dressing:
Juice of 1/2 to 1 lemon, (As you prefer!)
Salt and pepper to taste
3 tbspns olive oil
2 tblspn white balsamic vinegar, (You can also use rice or apple cider vinegar)
1 tblspn cold water
Whisk dressing briskly, then add to veggies and toss to thoroughly coat veggies; let sit in the fridge for 30 minutes
Shred a bed of lettuce/greens of your choice.
Spoon salad over greens, garnish with feta cheese and toasted pine nuts.
Enjoy!
Subscribe to:
Posts (Atom)