Or not, or not...
;-)
You'll note that the title, (Not the web address), of the blog has been changed to Urban Monique's Chef blog. If you'll pardon the obvious pun on our names, (or not, or not...), this was done to recognize and support Community Based Agricultural projects wherever they may be, and to alert readers to the benefits of joining a CSA and growing food at home, even in teeny, tiny lots like ours!
Our emphasis will remain focused on the Neighborhood Garden and King's Garden efforts and output throughout the seasons; we just want to encourage the ball rolling further!
E & M
Wednesday, November 17, 2010

Saturday, November 13, 2010
Check out my Sis' new blog
My Sis, acclaimed Northwest gardening writer Annie Lovejoy, has a new blog that is absolutely wonderful - Check it out, link to it and enjoy!
Anne's Blog
Anne's Blog
Friday, November 12, 2010
Ladies and Gentlemen; dinner is now being served in the Library
Were you aware of the startling fact that annual cookbook sales in the U.S. is measured in billions of dollars? That’s billions with a B, gang…
As I type, kicked back in the ol’ recliner, there’s a pile of books on the side table; two on Mexican regional cooking by Diana Kennedy, Michael Ruhlman’s Ratios and Charcuterie, (With Brian Polcyn), Frederic Sonnenschmidt’s Art of Garde Manger, and Harold McGee’s On Food and Cooking. The Kennedy books are just acquired, having read of Frances Mayes’ appreciation for her work; the others are almost constant references that I use pretty much every time I write on this blog.
M and I own what we think are a lot of books; I’m looking over at four shelves, each three feet wide, two six feet high and two at four feet, pretty much full and there’re more in our bedroom, respective caves, guitar shop and night stands.. Of those, we have roughly four linear feet of cookbooks. A lot of the stuff we actually read, we buy used in paperback, read, share and then donate to the YWCA Resale Store. Cookbooks, on the other hand, are predominantly hard backs with shiny dust covers; some are even signed by the authors.
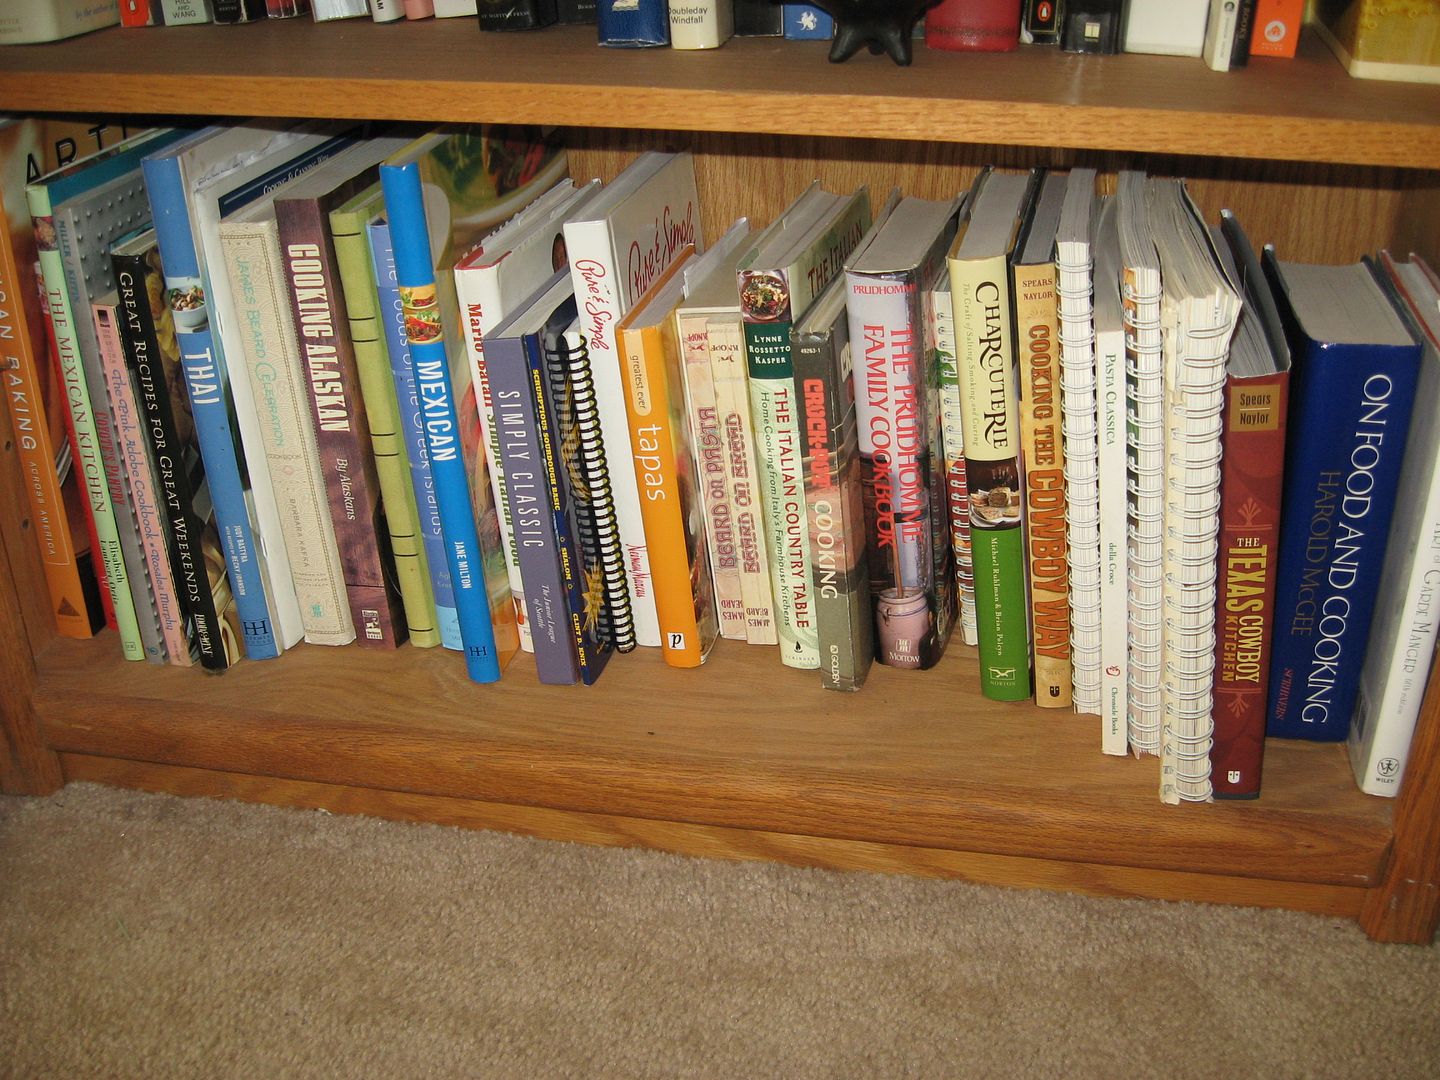
Here’s the rub; in our collection, we’re talking around 30 to 40 titles. If you’re a twenty first Century foodie, there a good few authors you’d recognize; Rick Bayless, Lynne Rosetto Kasper, Mark Miller, Grady Spears, Mike Simon, Maggie Glezer and Mario Batalli, to name a few. Despite all those bright lights, the books that get used consistently and frequently would be limited to Irma Rombauer’s Joy of Cooking and James Beard’s American Cookery. Those that I have actually read, cover to cover, would also tally exactly two; Harold McGee’s seminal volume and Claudia Roden’s The Book of Jewish Food. That’s what, .5% or thereabouts?
How does that stack up to your experience? An informal survey found most folks said things like, “Got it as a gift, never cracked it,” “Use it very rarely,” and things along that line: Truth be told, that’s probably the way things are supposed to be; cookbooks are, after all, reference volumes and not much more than that.
I’ve been cooking my whole life, for pleasure and occasionally for a living: That said, it’s time to share another secret. Putting up recipes here for y’all was actually quite a bit of work for me, because I do not typically use recipes; I cook from the heart and off the cuff, always have, always will.
To cook professionally, you must be able to put out consistent, repeatable, high quality food, and you have to be able to do that quickly and efficiently. I am a pretty good at best, but more to the point, I am quite good at the quick and efficient part. To do what I do pretty much unconsciously as a recipe, measured out and tested, is work! I’ve always been a great skier; in my teens, I became a ski instructor. I was doing great until they said “Those are really nice turns, how do you do that?” I stared back blankly at them and said something pithy like “Ummmmm, I uh, just turn…” In teaching me to teach, they first had to alert me to the fact that I was a great skier, not a skier who knew how to teach others what to do in a logical and repeatable fashion. Cooking is much the same.
That said, over the winter months, I’m gonna try and relate to you some tricks and tips and methods whereby you can cook the same way; the desired end result being that you, as I do, maybe steal concepts and themes from all those cookbooks far more often than you do simply repeat a recipe. Iron Chef Mike Simon, one of my culinary heroes, says he uses Beard’s American Cookery for ideas when he is in need of a new dish; sounds like a darn good idea to me!
Starting with the recipes IS important. Like learning anything else, repetition breeds familiarity, practice makes perfect, and routine is great so long as it is accurate and thorough. Somewhere along the experience timeline, you look up and realize that you didn’t really think about the fact that pasta dough is a consistent ratio of three parts flour to two parts egg, you just pulled out what you needed, measured, mixed, rolled, cut, boiled, served and it was fantastic; that’s the magic we’re after.
So, in a rambling way, what I’m proposing is that, if you want to cook and cook well, a few well chosen reference guides are a good thing, maybe even a necessity. What follows is just my recommendation; if you have them, pull them out, give them a go over, and we’ll go from there. If you don’t own them, go to your local bookstore, or hit up a good used seller on Amazon and pick up a copy; you can thank me later…
1. James Beard’s American Cookery
2. Irma Rombauer’s Joy of Cooking
3. Michael Ruhlman’s Ratios
That’s it. That’s more than enough, in fact. So, let’s get crackin’, ‘K?
As I type, kicked back in the ol’ recliner, there’s a pile of books on the side table; two on Mexican regional cooking by Diana Kennedy, Michael Ruhlman’s Ratios and Charcuterie, (With Brian Polcyn), Frederic Sonnenschmidt’s Art of Garde Manger, and Harold McGee’s On Food and Cooking. The Kennedy books are just acquired, having read of Frances Mayes’ appreciation for her work; the others are almost constant references that I use pretty much every time I write on this blog.
M and I own what we think are a lot of books; I’m looking over at four shelves, each three feet wide, two six feet high and two at four feet, pretty much full and there’re more in our bedroom, respective caves, guitar shop and night stands.. Of those, we have roughly four linear feet of cookbooks. A lot of the stuff we actually read, we buy used in paperback, read, share and then donate to the YWCA Resale Store. Cookbooks, on the other hand, are predominantly hard backs with shiny dust covers; some are even signed by the authors.
Here’s the rub; in our collection, we’re talking around 30 to 40 titles. If you’re a twenty first Century foodie, there a good few authors you’d recognize; Rick Bayless, Lynne Rosetto Kasper, Mark Miller, Grady Spears, Mike Simon, Maggie Glezer and Mario Batalli, to name a few. Despite all those bright lights, the books that get used consistently and frequently would be limited to Irma Rombauer’s Joy of Cooking and James Beard’s American Cookery. Those that I have actually read, cover to cover, would also tally exactly two; Harold McGee’s seminal volume and Claudia Roden’s The Book of Jewish Food. That’s what, .5% or thereabouts?
How does that stack up to your experience? An informal survey found most folks said things like, “Got it as a gift, never cracked it,” “Use it very rarely,” and things along that line: Truth be told, that’s probably the way things are supposed to be; cookbooks are, after all, reference volumes and not much more than that.
I’ve been cooking my whole life, for pleasure and occasionally for a living: That said, it’s time to share another secret. Putting up recipes here for y’all was actually quite a bit of work for me, because I do not typically use recipes; I cook from the heart and off the cuff, always have, always will.
To cook professionally, you must be able to put out consistent, repeatable, high quality food, and you have to be able to do that quickly and efficiently. I am a pretty good at best, but more to the point, I am quite good at the quick and efficient part. To do what I do pretty much unconsciously as a recipe, measured out and tested, is work! I’ve always been a great skier; in my teens, I became a ski instructor. I was doing great until they said “Those are really nice turns, how do you do that?” I stared back blankly at them and said something pithy like “Ummmmm, I uh, just turn…” In teaching me to teach, they first had to alert me to the fact that I was a great skier, not a skier who knew how to teach others what to do in a logical and repeatable fashion. Cooking is much the same.
That said, over the winter months, I’m gonna try and relate to you some tricks and tips and methods whereby you can cook the same way; the desired end result being that you, as I do, maybe steal concepts and themes from all those cookbooks far more often than you do simply repeat a recipe. Iron Chef Mike Simon, one of my culinary heroes, says he uses Beard’s American Cookery for ideas when he is in need of a new dish; sounds like a darn good idea to me!
Starting with the recipes IS important. Like learning anything else, repetition breeds familiarity, practice makes perfect, and routine is great so long as it is accurate and thorough. Somewhere along the experience timeline, you look up and realize that you didn’t really think about the fact that pasta dough is a consistent ratio of three parts flour to two parts egg, you just pulled out what you needed, measured, mixed, rolled, cut, boiled, served and it was fantastic; that’s the magic we’re after.
So, in a rambling way, what I’m proposing is that, if you want to cook and cook well, a few well chosen reference guides are a good thing, maybe even a necessity. What follows is just my recommendation; if you have them, pull them out, give them a go over, and we’ll go from there. If you don’t own them, go to your local bookstore, or hit up a good used seller on Amazon and pick up a copy; you can thank me later…
1. James Beard’s American Cookery
2. Irma Rombauer’s Joy of Cooking
3. Michael Ruhlman’s Ratios
That’s it. That’s more than enough, in fact. So, let’s get crackin’, ‘K?
Thursday, November 4, 2010
Fusion
Comfort food is a wonderful thing, if for nothing else, than from the breadth and depth of the cornucopia. One of my favorite things to do is to twist a traditional recipe into something similar in feel but different in content; maybe that’s what folks mean when they call something “fusion” cooking, maybe not, but it works for me! Hence comes Enchilada Lasagna…
With noodles, (Mas o menos), made from Masa, homemade queso, and homegrown veggies, this is a real treat all around.
Queso Blanco and Queso Fresco are names that are often used interchangeably, but they are not the same beast: Both are white cheeses commonly made from fresh cow’s milk, are usually salted, and appear often in Mexican and South American cuisine, but that’s where the broad similarities end. Queso Fresco is made with rennet, used to form the curds. Queso Blanco uses an acid, such as vinegar, lemon or lime juice, to form curds. Queso Fresco will melt readily and is great for making its namesake dipping and topping salsa, know ubiquitously throughout the southwest as simply Queso. Queso Blanco does not really melt, but will become softer or creamer when heated. It’s sometimes known as queso para freir, literally cheese for frying; it retains its shape very nicely when fried, and takes well to breading or coating with herbs and chiles. The variations of these cheeses are as broad as the regions they are made in; they are not dissimilar in consistency to Feta or Peneer.
Queso Blanco
One gal whole milk, (Pasteurized or raw is cool, but ultrapasteurized is NOT!)
1/2 cup of white vinegar, lemon or lime juice
Salt to taste
Pour milk into a non-reactive pan on medium heat. Stir regularly to avoid scalding on the bottom of the pan. Using a cooking thermometer, track your temp throughout; you’re looking for 180º F.

If you’re using citrus for your acidifier, juice, seed, and measure. Lemon or lime juice adds a certain note to the flavor of your cheese that is very pleasant; I’m not sure how to specify what it tastes like, you’ll just have to try all three and decide which you like best. I have used cider vinegar as well and been very pleased with the results. My current favorite is lemon juice, FYI…

Add your acidifier: Curds will begin to separate from the whey right away; they are quite small in this cheese, (Noticably smaller than the Ricotta recipe I shared a while back, so if you see that and wonder, fear not!). The curds are about small pea size at best in this recipe.
Let the mixture simmer for a couple minutes and then carefully pour it off into a cheesecloth lined colander; be sure to use several layers of cheesecloth if you have the standard wide-weave kind you’ll find in the grocery or hardware store.

You can toss the whey, or you can save that to make ricotta with, or you can dump it into your compost heap.
Now is the time to salt the curds and add any herbs, chiles, etc; in this recipe, I’ve diced up some nice sweet peppers that will flavor this batch. Gently mix everything together. Note that you can add a bit more salt than you might like when tasting at this point – You’re going to hang and drain this cheese for a couple hours, and salt will be some of what goes away.

As we did with the Ricotta, bundle up your cheese, tie it off in a nice little ball and hang it from your faucet.

Draining your cheese is something that shouldn’t be rushed; I like to go at least 2 hours, and you can go well more than that if you want – The more you drain, the firmer your cheese!
Recipe yields about 16 ounces of lovely Queso. It will keep, well sealed, in the fridge for roughly as long as the expiration date on the milk you used, but really, it shouldn’t last that long, OK? Here’s what ours looks like with that fantastic sweet, red pepper in it. ¿Muy bonita, si?

Corn Tortillas, (in this case, AKA noodles)
2 cups corn Masa Harina, white or yellow
1 ¼ cups hot water
1 teaspoon salt
A starting note; make sure you get Masa, AKA corn flour, NOT corn meal – The latter will not do the trick!
Mix masa and salt in a bowl. Add the hot water and stir until you can handle the mix without it sticking too much to your paws; at first, the mix will seem a bit dry and that’s OK. Add more hot water a teaspoon at a time until you form a nice, semi-elastic dough that stays together and doesn’t stick to the bowl. Knead the dough for a couple minutes, adding tiny amounts of water or masa as needed to keep the dough workable and not too wet or dry; you want it to feel moist and workable, but not wet or sticky; it almost feels like a nice, loamy soil when it’s right, (If that makes sense…)
Pinch off a piece of dough and roll it between your hands into a golf ball sized chunk. Let these sit, separated and covered with a moist paper towel, on a plate for a few minutes. If you have a tortilla press, (Or your rolling pin, if not and that’s just fine too!), now’s the time to get it out, along with a gallon freezer bag cut into two equal pieces that you’ll use to hold your dough while you roll or press it out.
FYI, this ain’t like pie dough, so it is not gonna get tougher if you handle it:
Grab a golf ball and flatten it between your palms until it’s about a 3” circle. Place that between your plastic sheets and roll or press until you get a nice 6” to 7” tortilla; they can be a bit thicker than the store bought ones – Believe me, they’ll be WAY better tasting!
If we were making straight tortillas, we’d be heating up a dry cast iron pan or comal over medium high heat; cook the tortillas for about 45 second to a minute a side, then place them in aluminum foil in a warm place to rest for a bit until you’re ready to use them.
In this instance, I’m using the dough to make analog lasagna noodles, so I pressed out the dough until it’s just thick enough for my pasta roller to receive and worked it through once on the widest setting, then let the results sit and ry for a few minutes, (No additional cooking needed for this variation.)

Tomato Sauce
We’re gonna make a basic Mexican influenced sauce for this dish, from fresh tomatoes. We’re going quick and dirty here, ‘cause this is dinner on a working day, no guests, no time, no energy, so… Gonna forgo blanching, etc in the name of speed!
6 ripe tomatoes of your choice
1 clove garlic
5 or 6 sprigs of cilantro
Couple slices of large onion
1 medium hot chile of your choice
½ teaspoon cumin seed
¼ teaspoon annatto seed
¼ teaspoon celery seed
½ teaspoon Mexican Oregano
¼ teaspoon chipotle flake
Shot of vegetable oil
Dash salt

Cut tomatoes in half, rough chop garlic, cilantro, onion and chile; throw all that plus the oil into a blender or processor.

Combine cumin, annatto, celery seed, oregano, chipotle and salt in a spice grinder or mortar and pestle and grind to a fine, even powder.

Add spice mix to veggies and blend/process until everything is nice and uniform. Open top of blender. Stick your nose in there. Breathe deep and marvel at your skillful handiwork. Go find other folk in the house, make them smell it and tell you how amazing you are…

Variation: You could substitute tomatillos for tomatoes in any percentage you like; doing the whole thing yields a gorgeous green sauce!
Now we’re ready to assemble the main dish. Lightly oil a glass baking dish, then begin by ladling some sauce in; smooth that out, add an even layer of protein, (Again, I used some killer fajita beef and chicken made by my pal Kevin, which I cubed. You could also use pork, or homemade Chorizo, for which there is a recipe lurking somewhere on this blog!). Add a sprinkling of cheese, then a layer of tortilla/noodle and repeat; I like to end with tortilla, as I think that lets the flavors get locked in and blend better as everything bakes. I topped this with some nice, sharp shredded Asiago, to further confuse the nationality of the dish and add a nice little counterpoint to the mild queso.
Bake at 350 for 35 to 45 minutes, until top tortilla is browned and everything is nice and bubbly. Allow to cool for 10 minutes on stove top prior to plating.

For topping, you simply gotta have some pico and guac, don’t ya think?
Citrus Pico
2 or 3 ripe, medium tomatoes
¼ to ½ medium sweet onion
5 – 8 sprigs cilantro
1 medium to hot chile of your choice
1 small lime
Shot of grapefruit juice
Salt and Pepper to taste

Dice tomatoes and onion, chiffenade cilantro and fine dice the chile. Add all to a nonreactive bowl. Juice lime over veggies, keeping seeds out of course. Add shot of grapefruit juice, and salt and pepper to taste. Toss to coat and blend, allow to rest chilled for 30 minutes.


Guacamole Authentico
2 or 3 ripe, medium avocados
1 firm medium tomato
1 or 2 ¼ slices from a medium, sweet onion
½ small Shallot
5 or 6 sprigs fresh Cilantro
1 small sweet chile
1 small lime
salt to taste.
Skin avocados and remove flesh with spoon into a molcajete or nonreactive mixing bowl. Core, seed, and dice tomato to ¼”. Fine mince cilantro and shallot. Stem, seed, core and fine mince chile. Quarter the lime.
Mash avocado gently with a fork, leaving it with substantial chunks roughly ½”in size. Add tomato, onion, garlic, cilantro, and chile. Squeeze juice from ½ of lime, salt lighly and taste; add more lime as needed. Cover and refrigerate for 30 minutes to allow flavors to blend.


To plate, shred a 50% - 50% mix of iceberg lettuce and red cabbage. Place shreds in a bowl and lightly salt and pepper. Place a mound of the shreds on a plate, serve a generous slice of the casserole on top, then add small spoonfuls of pico, guac, and sour cream. Serve with a nice, cold lager or pilsner.


Desert, anyone?
M loves sweets, especially good ones: I’m pretty sure I’ve shown the crème caramel variation of this incredible desert, but this time we’ll go for a very cool variation of that, which I dub Crème Añejo. Contrary to popular opinion, it’s fast and easy. Crème brûlée/Crème Añejo is a baked custard, as opposed to a stirred custard, (Done on a stove top in a double boiler); both are easy, but for my mind, letting the oven do the work while I read beats the crud out of constant stirring, so… Seriously, making these guys takes maybe 10 minutes, tops, so what are y’all waiting for?
Crème Añejo
1 quart heavy cream
1 vanilla bean, split and scraped, (You can sub ½ teaspoon of extract too)
1 cup vanilla sugar, (Split and scrape a vanilla bean into 1 cup sugar, let sit for 1 hr+, then remove bean)
6 large egg yolks
Double shot of Añejo Tequila, (Could use Rum, Bourbon, Scotch, or...)
Preheat your oven to 325º F.
Arrange 6 ramekins in a glass baking dish at least 3” deep.
Put cream, vanilla bean and seeds into a nonreactive pan over medium heat. Bring mixture to a rolling boil and then immediately pull it off the heat. Let the mixture cool, covered, for 15 minutes. Remove the vanilla bean, which you can dry out and then use to make yet more vanilla sugar.

In a mixing bowl, combine ½ cup of the vanilla sugar and the egg yolks; whisk them together well. Now take the cream mixture and slowly pour that into the egg/sugar, whisking constantly.

For the Añejo caramel, pour the tequila into a sauce pan on medium high heat; Allow the booze to heat until the alcohol is boiled off; remove it from the heat.

Place the rest of the vanilla sugar into a pan on medium heat and allow it to melt thoroughly. Once it is liquefied, begin to add the tequila VERY SLOWLY – Liquid into caramelized sugar is volatile – The sugar superheats the liquid and will vaporize it explosively if you’re not REALLY careful about this process – Add the liquid a tiny bit at a time, stirring constantly and allowing the mixture to come to equilibrium before you add more. Once the booze and sugar are combined happily, add a tablespoon of butter and whisk everything together; immediately pour equal portions of the Añejo caramel into each ramekin.


Pour the custard into the ramekins to within roughly ¾” of the tops. Place the dish into your oven on a rack set in the middle position. Pour hot water into the dish until the water level is roughly ½ way up the sides of the ramekins.
Bake for 40 to 45 minutes. Check for done by jiggling each ramekin. If the custard is done, the edges will look firm but the middles will still jiggle a bit; this is just where ya wanna be, as the latent heat in the custard will complete the cooking while they rest.


Refrigerate the custards for at least 2 hours, then pull ‘em out and let ‘’em sit in room temp for at least 15 minutes: Run a knife around the rim of the ramekin, and then quickly flip 'em over onto a desert plate and viola, instant bliss!
Serve with a sprig of mint as a garnish; stand back and keep your hands and feet clear as your guests dig into this stuff!
With noodles, (Mas o menos), made from Masa, homemade queso, and homegrown veggies, this is a real treat all around.
Queso Blanco and Queso Fresco are names that are often used interchangeably, but they are not the same beast: Both are white cheeses commonly made from fresh cow’s milk, are usually salted, and appear often in Mexican and South American cuisine, but that’s where the broad similarities end. Queso Fresco is made with rennet, used to form the curds. Queso Blanco uses an acid, such as vinegar, lemon or lime juice, to form curds. Queso Fresco will melt readily and is great for making its namesake dipping and topping salsa, know ubiquitously throughout the southwest as simply Queso. Queso Blanco does not really melt, but will become softer or creamer when heated. It’s sometimes known as queso para freir, literally cheese for frying; it retains its shape very nicely when fried, and takes well to breading or coating with herbs and chiles. The variations of these cheeses are as broad as the regions they are made in; they are not dissimilar in consistency to Feta or Peneer.
Queso Blanco
One gal whole milk, (Pasteurized or raw is cool, but ultrapasteurized is NOT!)
1/2 cup of white vinegar, lemon or lime juice
Salt to taste
Pour milk into a non-reactive pan on medium heat. Stir regularly to avoid scalding on the bottom of the pan. Using a cooking thermometer, track your temp throughout; you’re looking for 180º F.
If you’re using citrus for your acidifier, juice, seed, and measure. Lemon or lime juice adds a certain note to the flavor of your cheese that is very pleasant; I’m not sure how to specify what it tastes like, you’ll just have to try all three and decide which you like best. I have used cider vinegar as well and been very pleased with the results. My current favorite is lemon juice, FYI…
Add your acidifier: Curds will begin to separate from the whey right away; they are quite small in this cheese, (Noticably smaller than the Ricotta recipe I shared a while back, so if you see that and wonder, fear not!). The curds are about small pea size at best in this recipe.
Let the mixture simmer for a couple minutes and then carefully pour it off into a cheesecloth lined colander; be sure to use several layers of cheesecloth if you have the standard wide-weave kind you’ll find in the grocery or hardware store.
You can toss the whey, or you can save that to make ricotta with, or you can dump it into your compost heap.
Now is the time to salt the curds and add any herbs, chiles, etc; in this recipe, I’ve diced up some nice sweet peppers that will flavor this batch. Gently mix everything together. Note that you can add a bit more salt than you might like when tasting at this point – You’re going to hang and drain this cheese for a couple hours, and salt will be some of what goes away.
As we did with the Ricotta, bundle up your cheese, tie it off in a nice little ball and hang it from your faucet.
Draining your cheese is something that shouldn’t be rushed; I like to go at least 2 hours, and you can go well more than that if you want – The more you drain, the firmer your cheese!
Recipe yields about 16 ounces of lovely Queso. It will keep, well sealed, in the fridge for roughly as long as the expiration date on the milk you used, but really, it shouldn’t last that long, OK? Here’s what ours looks like with that fantastic sweet, red pepper in it. ¿Muy bonita, si?
Corn Tortillas, (in this case, AKA noodles)
2 cups corn Masa Harina, white or yellow
1 ¼ cups hot water
1 teaspoon salt
A starting note; make sure you get Masa, AKA corn flour, NOT corn meal – The latter will not do the trick!
Mix masa and salt in a bowl. Add the hot water and stir until you can handle the mix without it sticking too much to your paws; at first, the mix will seem a bit dry and that’s OK. Add more hot water a teaspoon at a time until you form a nice, semi-elastic dough that stays together and doesn’t stick to the bowl. Knead the dough for a couple minutes, adding tiny amounts of water or masa as needed to keep the dough workable and not too wet or dry; you want it to feel moist and workable, but not wet or sticky; it almost feels like a nice, loamy soil when it’s right, (If that makes sense…)
Pinch off a piece of dough and roll it between your hands into a golf ball sized chunk. Let these sit, separated and covered with a moist paper towel, on a plate for a few minutes. If you have a tortilla press, (Or your rolling pin, if not and that’s just fine too!), now’s the time to get it out, along with a gallon freezer bag cut into two equal pieces that you’ll use to hold your dough while you roll or press it out.
FYI, this ain’t like pie dough, so it is not gonna get tougher if you handle it:
Grab a golf ball and flatten it between your palms until it’s about a 3” circle. Place that between your plastic sheets and roll or press until you get a nice 6” to 7” tortilla; they can be a bit thicker than the store bought ones – Believe me, they’ll be WAY better tasting!
If we were making straight tortillas, we’d be heating up a dry cast iron pan or comal over medium high heat; cook the tortillas for about 45 second to a minute a side, then place them in aluminum foil in a warm place to rest for a bit until you’re ready to use them.
In this instance, I’m using the dough to make analog lasagna noodles, so I pressed out the dough until it’s just thick enough for my pasta roller to receive and worked it through once on the widest setting, then let the results sit and ry for a few minutes, (No additional cooking needed for this variation.)
Tomato Sauce
We’re gonna make a basic Mexican influenced sauce for this dish, from fresh tomatoes. We’re going quick and dirty here, ‘cause this is dinner on a working day, no guests, no time, no energy, so… Gonna forgo blanching, etc in the name of speed!
6 ripe tomatoes of your choice
1 clove garlic
5 or 6 sprigs of cilantro
Couple slices of large onion
1 medium hot chile of your choice
½ teaspoon cumin seed
¼ teaspoon annatto seed
¼ teaspoon celery seed
½ teaspoon Mexican Oregano
¼ teaspoon chipotle flake
Shot of vegetable oil
Dash salt
Cut tomatoes in half, rough chop garlic, cilantro, onion and chile; throw all that plus the oil into a blender or processor.
Combine cumin, annatto, celery seed, oregano, chipotle and salt in a spice grinder or mortar and pestle and grind to a fine, even powder.
Add spice mix to veggies and blend/process until everything is nice and uniform. Open top of blender. Stick your nose in there. Breathe deep and marvel at your skillful handiwork. Go find other folk in the house, make them smell it and tell you how amazing you are…
Variation: You could substitute tomatillos for tomatoes in any percentage you like; doing the whole thing yields a gorgeous green sauce!
Now we’re ready to assemble the main dish. Lightly oil a glass baking dish, then begin by ladling some sauce in; smooth that out, add an even layer of protein, (Again, I used some killer fajita beef and chicken made by my pal Kevin, which I cubed. You could also use pork, or homemade Chorizo, for which there is a recipe lurking somewhere on this blog!). Add a sprinkling of cheese, then a layer of tortilla/noodle and repeat; I like to end with tortilla, as I think that lets the flavors get locked in and blend better as everything bakes. I topped this with some nice, sharp shredded Asiago, to further confuse the nationality of the dish and add a nice little counterpoint to the mild queso.
Bake at 350 for 35 to 45 minutes, until top tortilla is browned and everything is nice and bubbly. Allow to cool for 10 minutes on stove top prior to plating.
For topping, you simply gotta have some pico and guac, don’t ya think?
Citrus Pico
2 or 3 ripe, medium tomatoes
¼ to ½ medium sweet onion
5 – 8 sprigs cilantro
1 medium to hot chile of your choice
1 small lime
Shot of grapefruit juice
Salt and Pepper to taste
Dice tomatoes and onion, chiffenade cilantro and fine dice the chile. Add all to a nonreactive bowl. Juice lime over veggies, keeping seeds out of course. Add shot of grapefruit juice, and salt and pepper to taste. Toss to coat and blend, allow to rest chilled for 30 minutes.
Guacamole Authentico
2 or 3 ripe, medium avocados
1 firm medium tomato
1 or 2 ¼ slices from a medium, sweet onion
½ small Shallot
5 or 6 sprigs fresh Cilantro
1 small sweet chile
1 small lime
salt to taste.
Skin avocados and remove flesh with spoon into a molcajete or nonreactive mixing bowl. Core, seed, and dice tomato to ¼”. Fine mince cilantro and shallot. Stem, seed, core and fine mince chile. Quarter the lime.
Mash avocado gently with a fork, leaving it with substantial chunks roughly ½”in size. Add tomato, onion, garlic, cilantro, and chile. Squeeze juice from ½ of lime, salt lighly and taste; add more lime as needed. Cover and refrigerate for 30 minutes to allow flavors to blend.
To plate, shred a 50% - 50% mix of iceberg lettuce and red cabbage. Place shreds in a bowl and lightly salt and pepper. Place a mound of the shreds on a plate, serve a generous slice of the casserole on top, then add small spoonfuls of pico, guac, and sour cream. Serve with a nice, cold lager or pilsner.
Desert, anyone?
M loves sweets, especially good ones: I’m pretty sure I’ve shown the crème caramel variation of this incredible desert, but this time we’ll go for a very cool variation of that, which I dub Crème Añejo. Contrary to popular opinion, it’s fast and easy. Crème brûlée/Crème Añejo is a baked custard, as opposed to a stirred custard, (Done on a stove top in a double boiler); both are easy, but for my mind, letting the oven do the work while I read beats the crud out of constant stirring, so… Seriously, making these guys takes maybe 10 minutes, tops, so what are y’all waiting for?
Crème Añejo
1 quart heavy cream
1 vanilla bean, split and scraped, (You can sub ½ teaspoon of extract too)
1 cup vanilla sugar, (Split and scrape a vanilla bean into 1 cup sugar, let sit for 1 hr+, then remove bean)
6 large egg yolks
Double shot of Añejo Tequila, (Could use Rum, Bourbon, Scotch, or...)
Preheat your oven to 325º F.
Arrange 6 ramekins in a glass baking dish at least 3” deep.
Put cream, vanilla bean and seeds into a nonreactive pan over medium heat. Bring mixture to a rolling boil and then immediately pull it off the heat. Let the mixture cool, covered, for 15 minutes. Remove the vanilla bean, which you can dry out and then use to make yet more vanilla sugar.
In a mixing bowl, combine ½ cup of the vanilla sugar and the egg yolks; whisk them together well. Now take the cream mixture and slowly pour that into the egg/sugar, whisking constantly.
For the Añejo caramel, pour the tequila into a sauce pan on medium high heat; Allow the booze to heat until the alcohol is boiled off; remove it from the heat.
Place the rest of the vanilla sugar into a pan on medium heat and allow it to melt thoroughly. Once it is liquefied, begin to add the tequila VERY SLOWLY – Liquid into caramelized sugar is volatile – The sugar superheats the liquid and will vaporize it explosively if you’re not REALLY careful about this process – Add the liquid a tiny bit at a time, stirring constantly and allowing the mixture to come to equilibrium before you add more. Once the booze and sugar are combined happily, add a tablespoon of butter and whisk everything together; immediately pour equal portions of the Añejo caramel into each ramekin.
Pour the custard into the ramekins to within roughly ¾” of the tops. Place the dish into your oven on a rack set in the middle position. Pour hot water into the dish until the water level is roughly ½ way up the sides of the ramekins.
Bake for 40 to 45 minutes. Check for done by jiggling each ramekin. If the custard is done, the edges will look firm but the middles will still jiggle a bit; this is just where ya wanna be, as the latent heat in the custard will complete the cooking while they rest.
Refrigerate the custards for at least 2 hours, then pull ‘em out and let ‘’em sit in room temp for at least 15 minutes: Run a knife around the rim of the ramekin, and then quickly flip 'em over onto a desert plate and viola, instant bliss!
Serve with a sprig of mint as a garnish; stand back and keep your hands and feet clear as your guests dig into this stuff!
Subscribe to:
Comments (Atom)