Pasta Cacio e Pepe was the thing; pasta with cheese, butter and black pepper and not a damn thing more. If this doesn’t fly in the face of the common sentiment that making pasta dishes takes too long and is complicated, I don’t know what does. I do not remember specifically eating Cacio e Pepe when in Rome, but I do remember spaghetti Carbonara; add eggs and bacon to Cacio, and in fact, that’s what you’ve got, so maybe that was the memory nugget, eh? In any case, fall is coming and that signals a slow shift to the wonderful comfort foods of the cooler seasons, and what better way to start than this?
Note that our version used Parmesan instead of Pecorino Romano, which is probably blasphemous, but it’s what we had and we love it and, if nothing else, if affords us an opportunity to try it again down the line with the real cheese, right?
Our meal shaped up as follows; while prep and cooking were certainly a collaborative effort, the credit for this goes to Monica, who put everything together and had it ready to assemble and finish off when I got home from work.
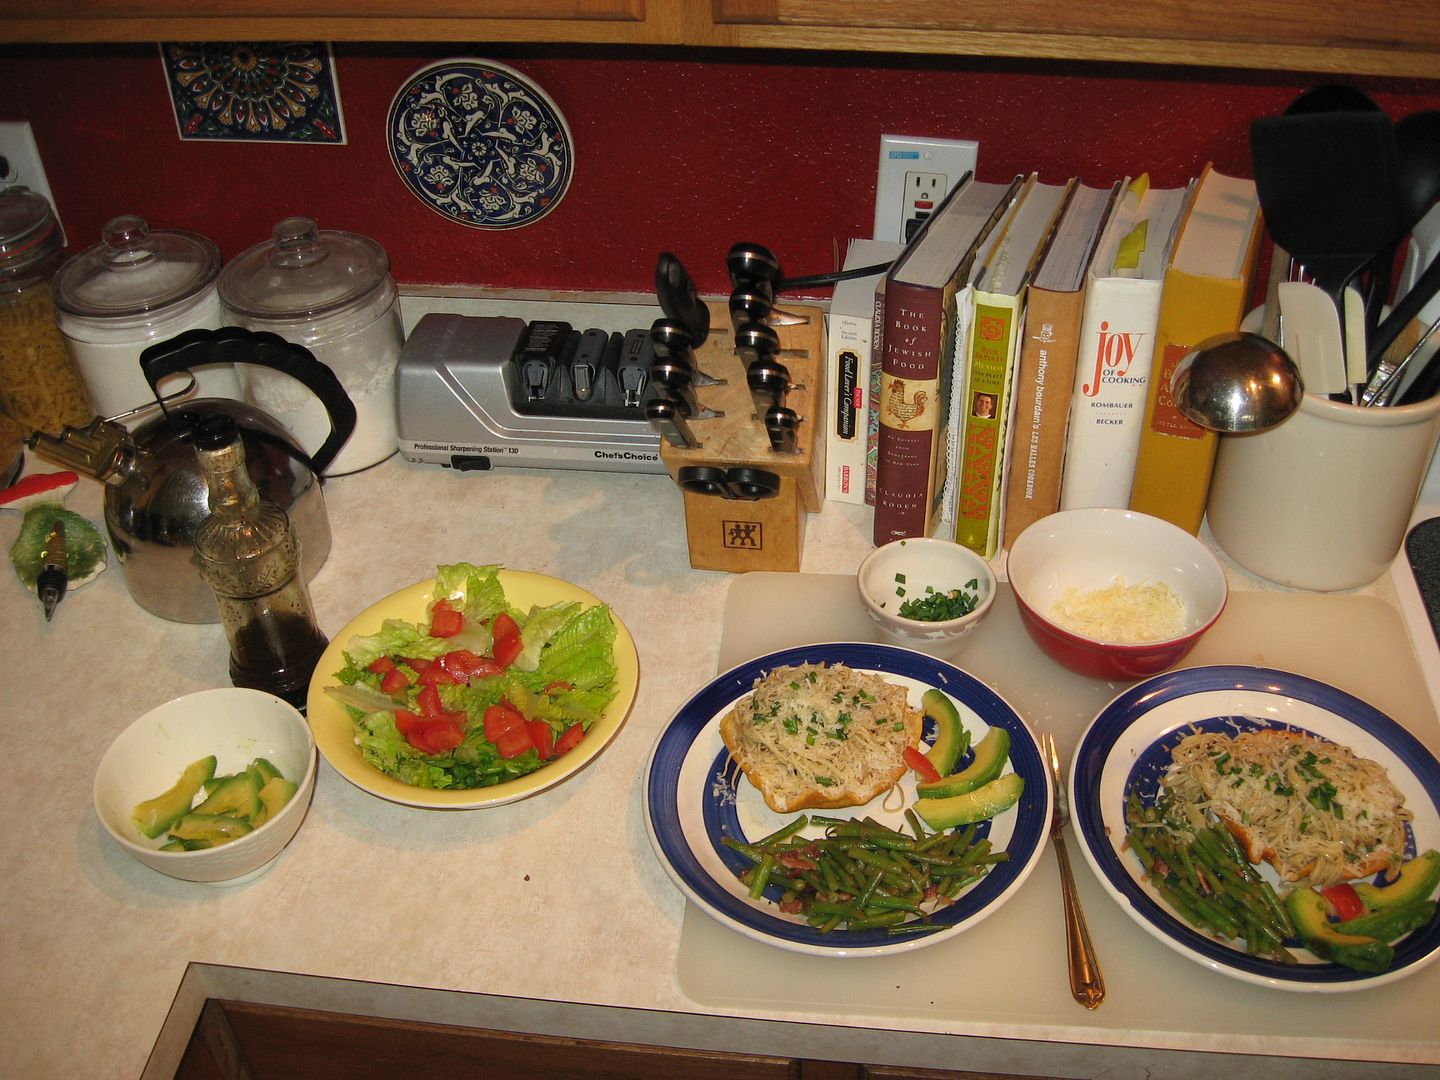
Pasta Cacio e Pepe with homemade angel hair noodles,
served in a parmesan cheese bowl.
Haricots Verts
Fresh green salad
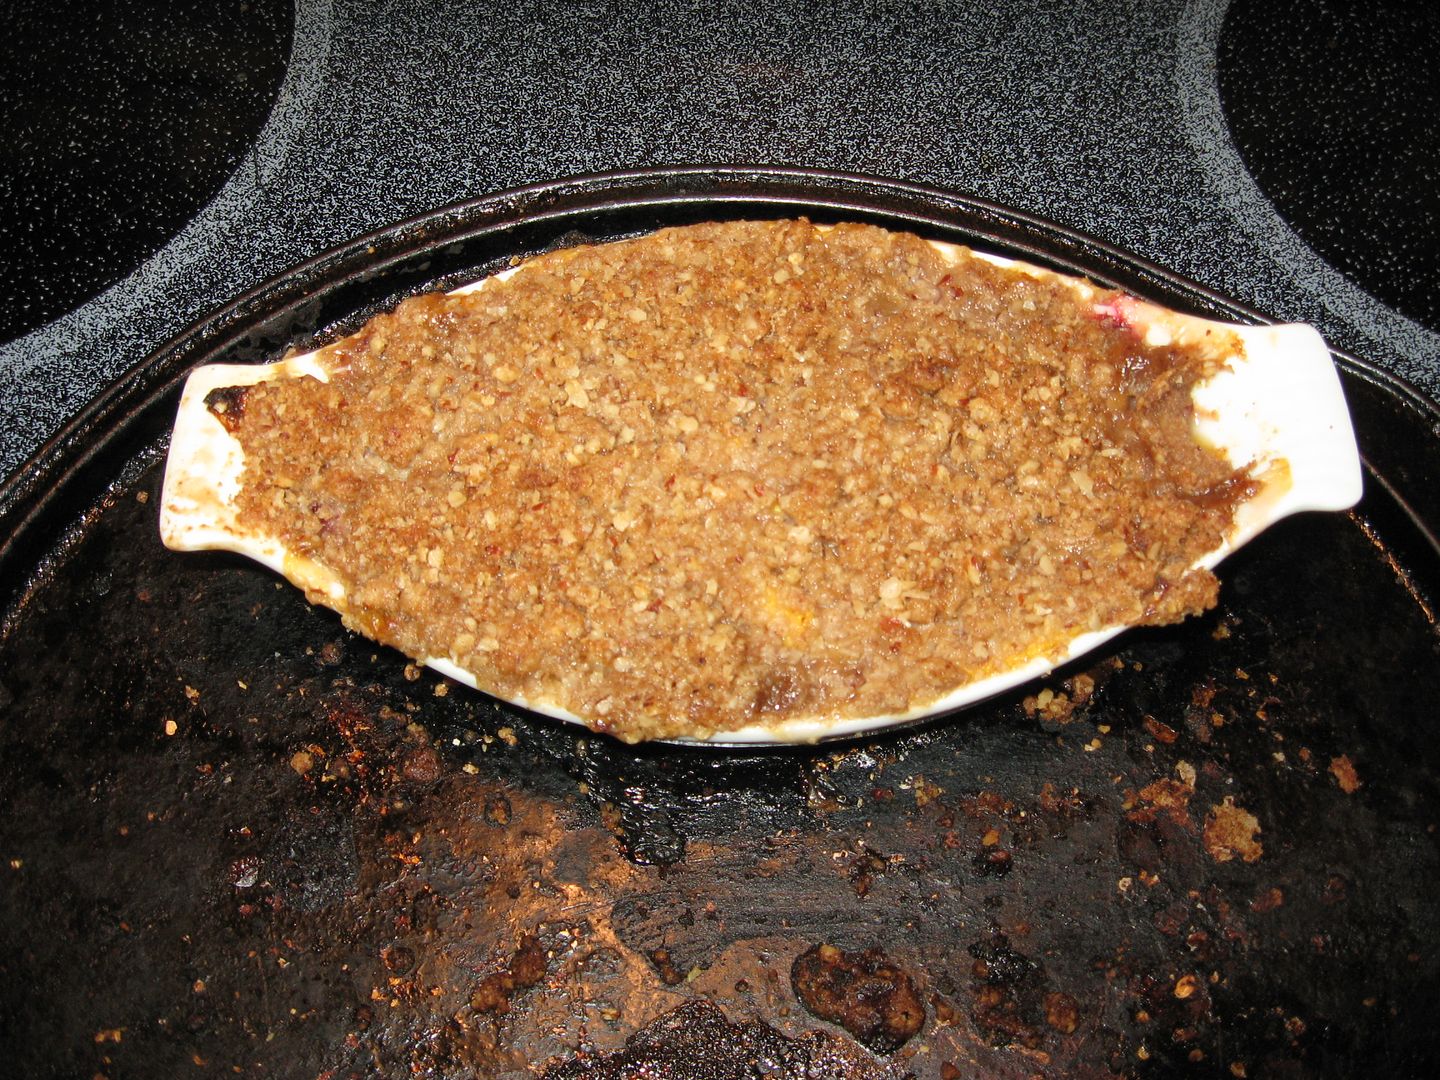
Peach crisp.
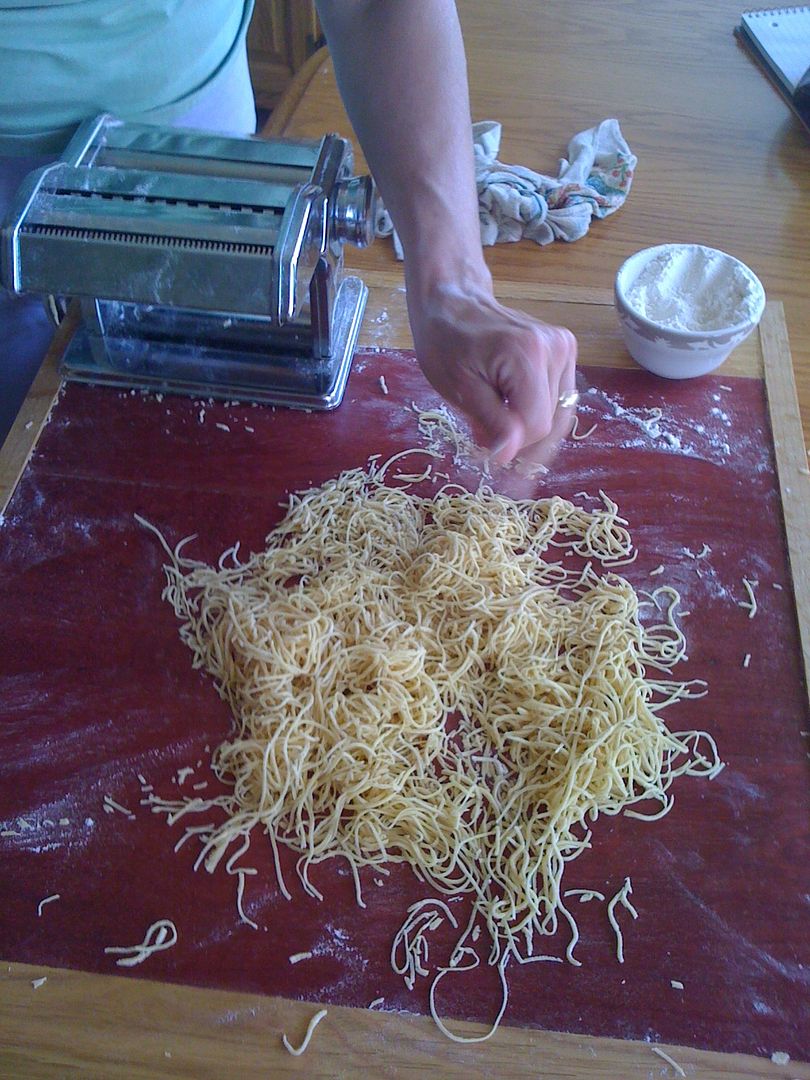
For the pasta, M combined 50% Semolina flour with 50% general purpose and eggs; this was our first run with genuine Italian Semolina flour, which we bought online from A. G. Ferrari. I have to say that this was a big reminder about the origin and quality of ingredients. Homemade pasta is great; homemade pasta with the best ingredients is as good as it gets anywhere... The pasta dough was phenomenal; it was the prettiest golden brown, it was a joy to handle, dried wonderfully, cooked well and tasted out of this world; how’s that for high praise?
M’s Homemade Angel Hair
1 cup all purpose flour
1 cup Semolina flour
3 large eggs
1 Tablespoon Olive Oil
Pinch of Salt
Combine flour and salt in a large bowl; make a well in the middle of the flour and add eggs and oil. Incorporate eggs into flour mixture with a fork by gently turning the flour into the eggs. Work by hand until well kneaded and very elastic. Cover with a dry cloth and refrigerate for 30 minutes. Flatten out dough and cut into quarters to work into noodles.
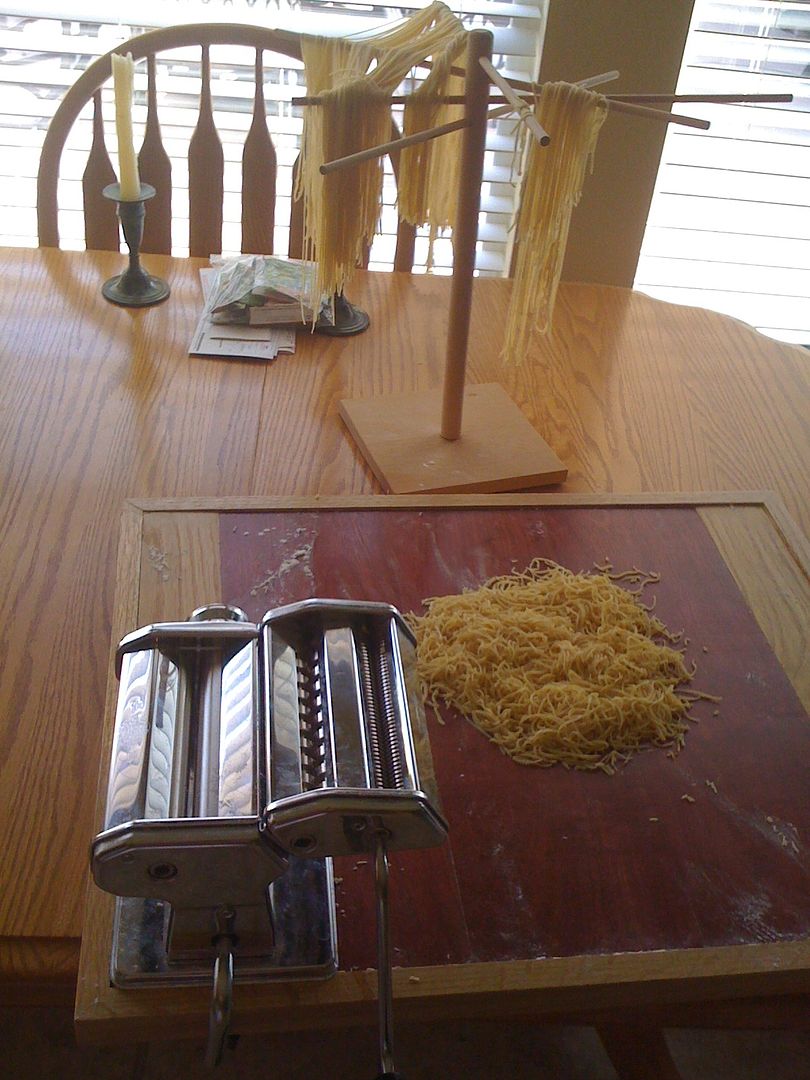
We contemplated using the pasta attachment on our KitchenAid, but to be honest, we haven’t used it very much, so when we got out that, plus the required sausage maker, and started looking at pieces and instructions and… We looked at each other and M said, “Let’s do it by hand,” so out came our trusty Marcato Atlas and we were off to the races. This maker is the king as far as I am concerned; they are not cheap, so if you ever find a good working used one for under, say, $40, snap it up, (They go around $75 new).
M’s recipe serves 4, so we took the ‘leavin’s,’ (The short sections of noodles), and froze them for later use in soup or more pasta, or… We hung the cut pasta up to dry on a rack for about 20 minutes or so while we got ready to cook.
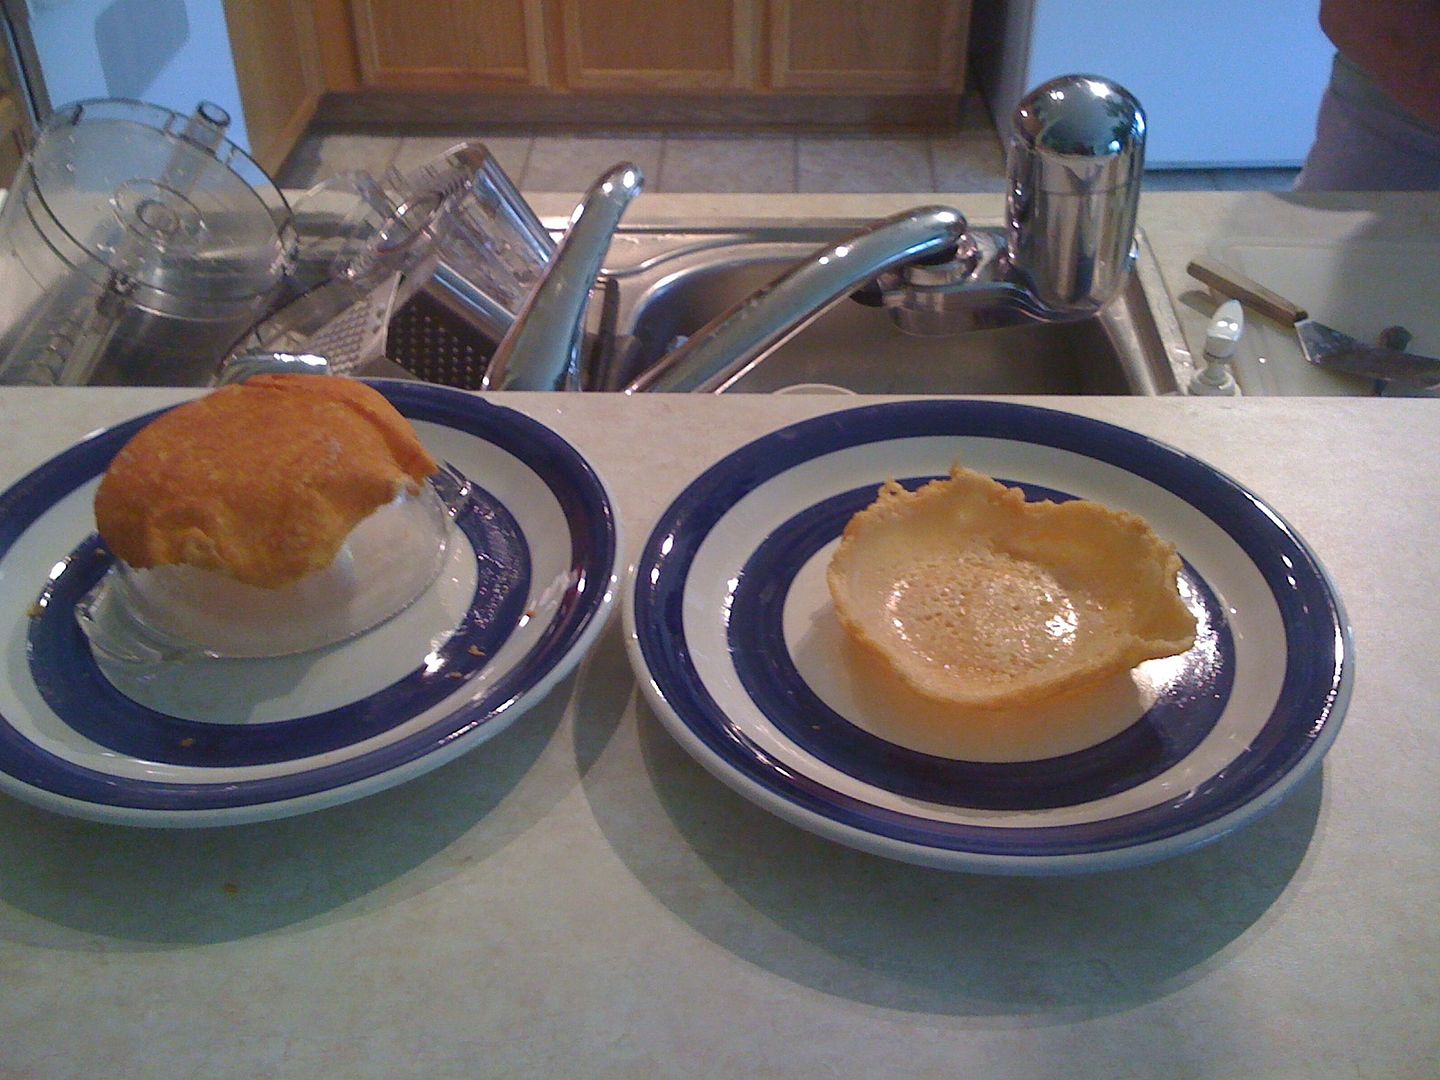
M grated a whole bunch of Parmigiano; for the bowls, she used a small sauté pan and glass ramekins for molds. She melted a layer of cheese in the pan on medium heat, and when it was nice and bubbly and starting to turn golden on the cooking side, she flipped them onto the molds and let them cool.
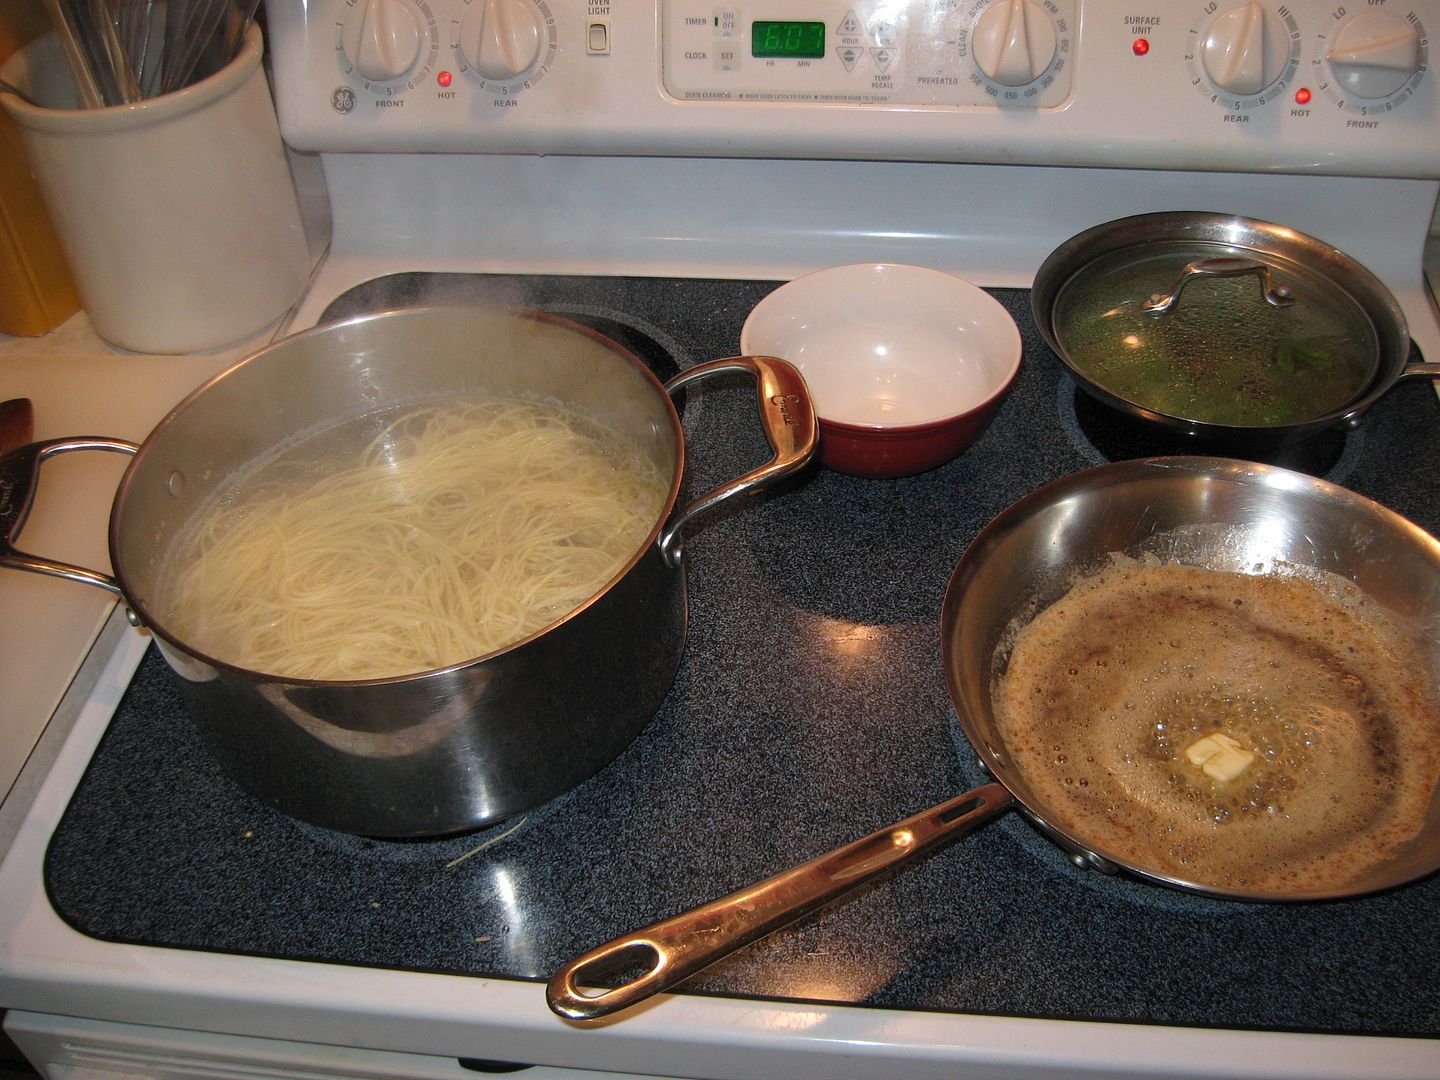
Pasta water was prepared with a little olive oil and plenty of Kosher salt, (Your pasta water should taste like it has salt in it, FYI; not knock your butt over sea water, but definitely present!).
For the Haricots Verts, M trimmed the ends as needed, then trimmed the fat from and diced bacon. She sautéed the bacon until almost done, then added diced shallot. She deglazed the sauté pan with a little red wine, added about ½ cup chicken stock and reduced the mixture by about 50% for plating.
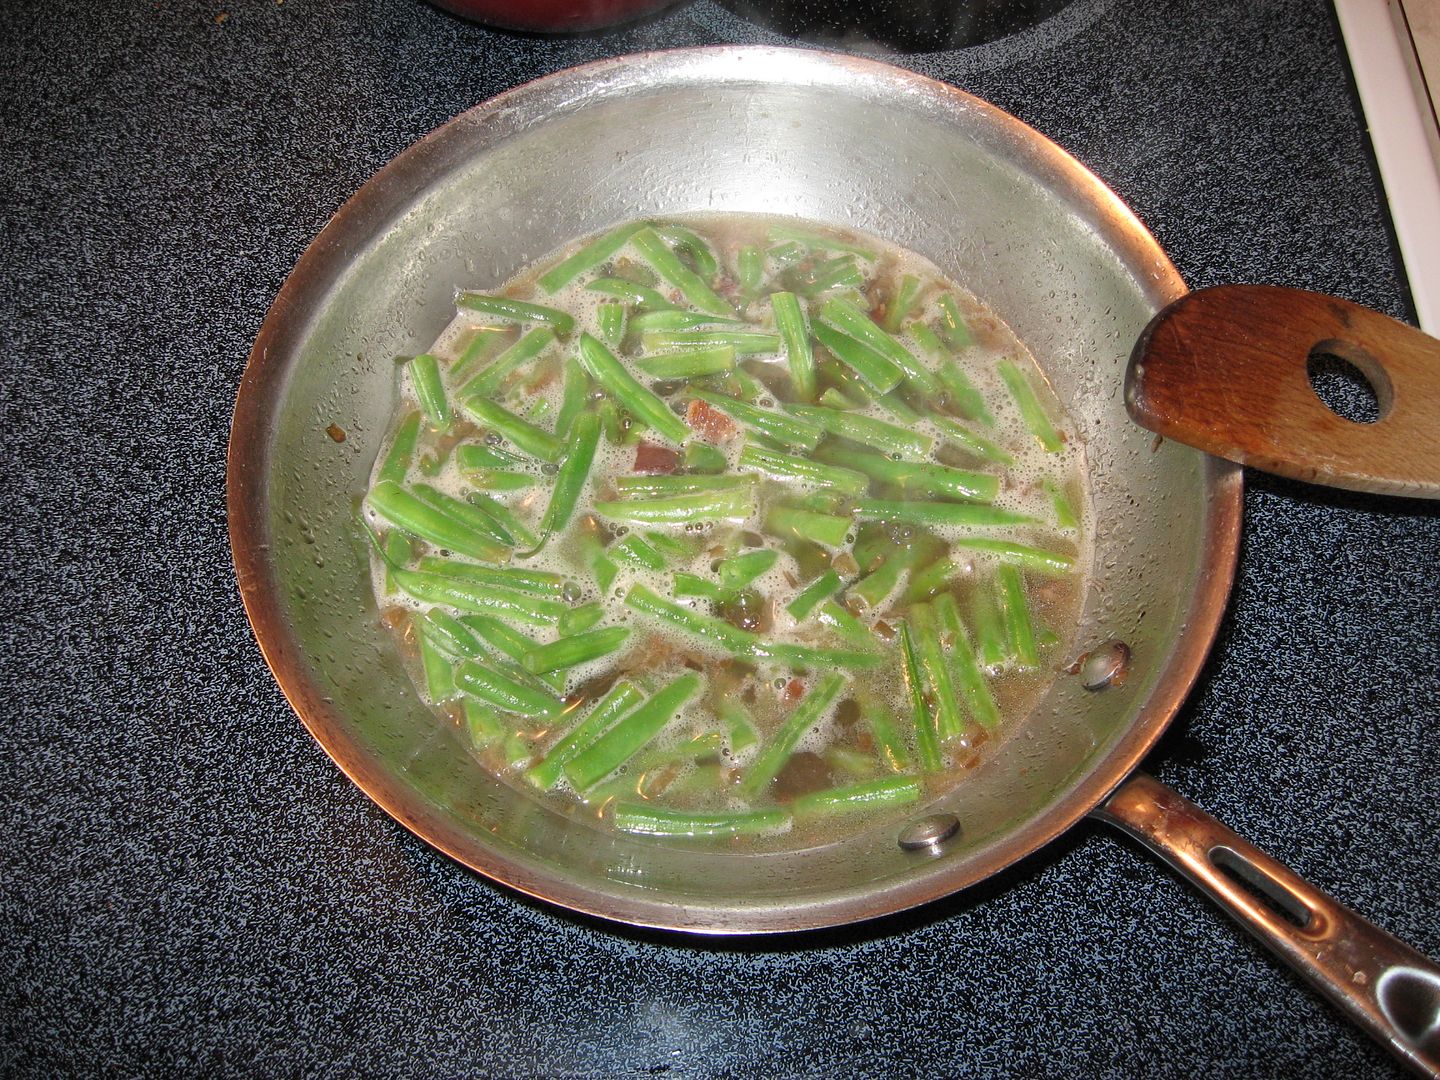
Terminology digression: What is deglazing and why would I do that? Excellent question, invisible Muse! Deglazing is done when foods are sautéed, fried, etc; what you’re doing is simply leaving the heat on, and then using a liquid to loosen up and incorporate all the little naughty bits the cooking process left behind. By getting all that stuff loosened up and in suspension with your deglazing liquid, you get all the wonderful depth and breadth of flavor you’d missed if you didn’t deglaze. In M’s example above, she used the red wine to pull all the bacon and shallot flavors off the pan she might have missed, then combined that with the chicken stock to get a really nice background flavor profile, then reduced it all to concentrate the flavor further. Deglazing is one of another easy little secret that makes a huge difference in taste, so DO IT! You can deglaze with wine, stock, vinegar, marinade, juice, what have you. Try a flavor you feel will be complimentary; experiment and develop your own favorites!
M did a nice green salad, and added fresh wedges of avocado, which was a super touch; the creamy cool of the avocado was amazing with the pasta!
For fruit crisps, M makes the crisp in bulk and freezes it; that way, when she finds some nice fruit, she just pulls some crisp out of the freezer, does it up and viola!
Fresh Fruit Crisp
Choose whatever you like and find in season! Apples, pears, berries, peaches, you name it! Add sugar to taste, cinnamon or nutmeg, maybe some chopped nuts as you see fit. For the crisp;
¾ Cup all purpose flour
¾ cup dark brown sugar
¼ cup rolled oats
4 ounces of unsalted butter, chilled and cut into ¼” cubes
¼ teaspoon salt
Combine all ingredients and mix by hand or with two knives until the butter is pea sized, about half the size of your original cubes. That’s it! Spread an even layer over your fruit mixture in ramekins or a fairly shallow baking dish.
Bake at 350 for about an hour, or until crisp is brown and, well, crispy!
A meal like this needs to be coordinated in preparation to come out just right; you can see we had several balls in the air at one time, so working as a team is not only a joy, it gets it done right. Fresh pasta is gonna wanna cook for maybe 2 minutes, max. You do not want it sitting around for longer than a couple minutes after cooking or it will want to get sticky, so you need to have everything ready to go. We plated the cheese bowls and salad and then finished the pasta.
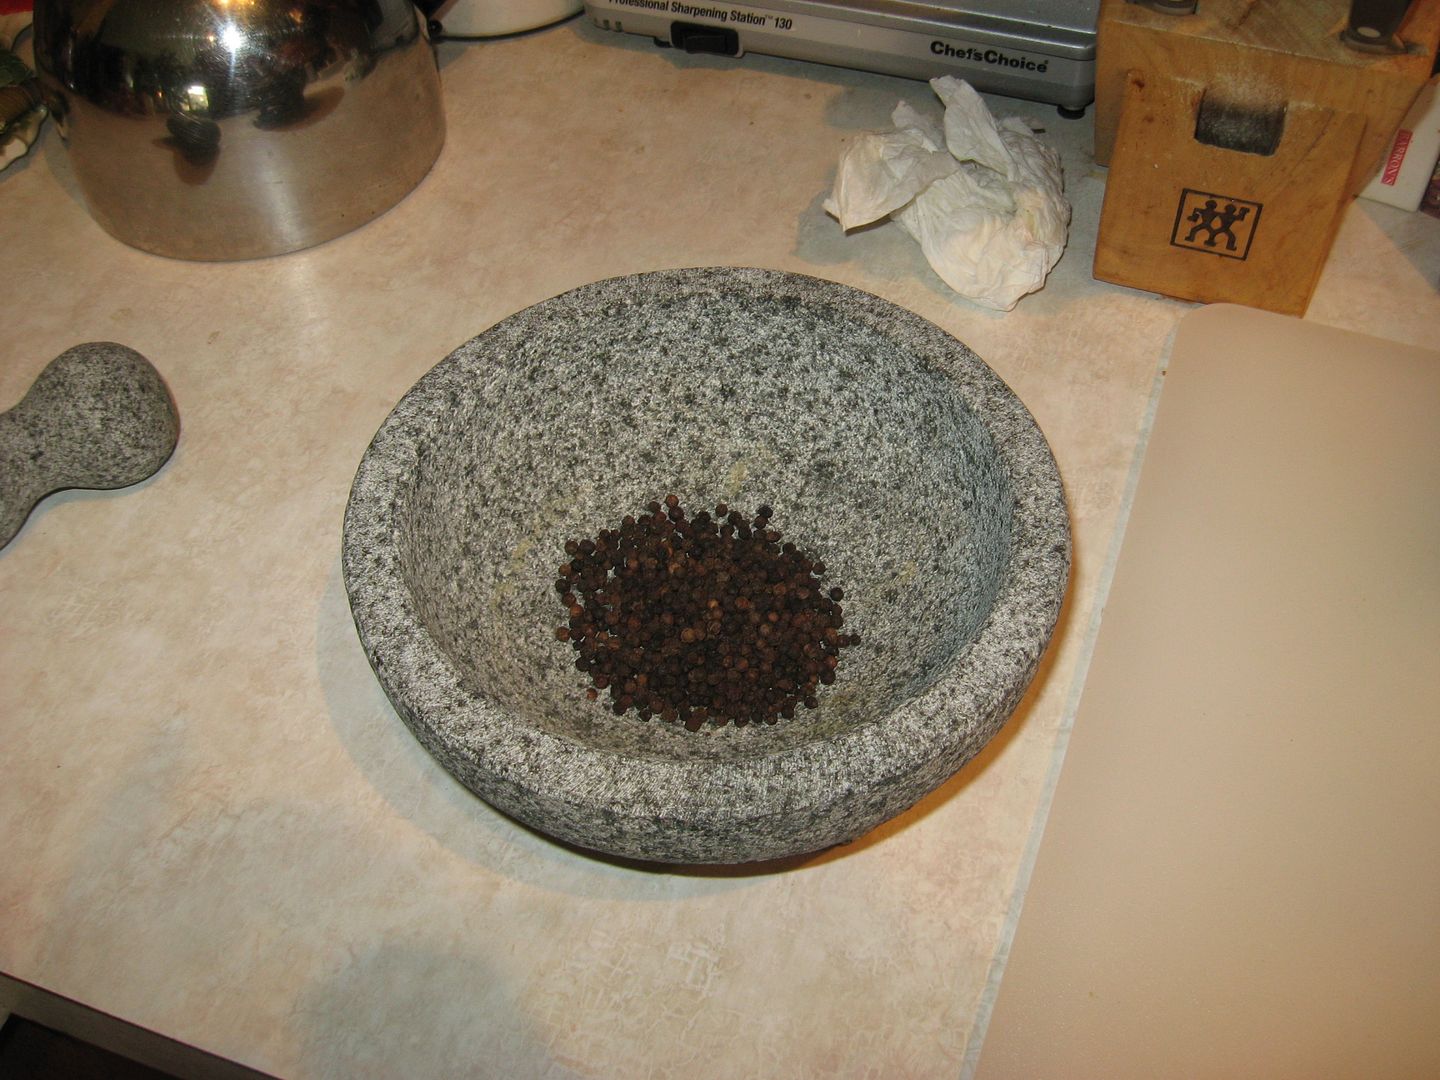
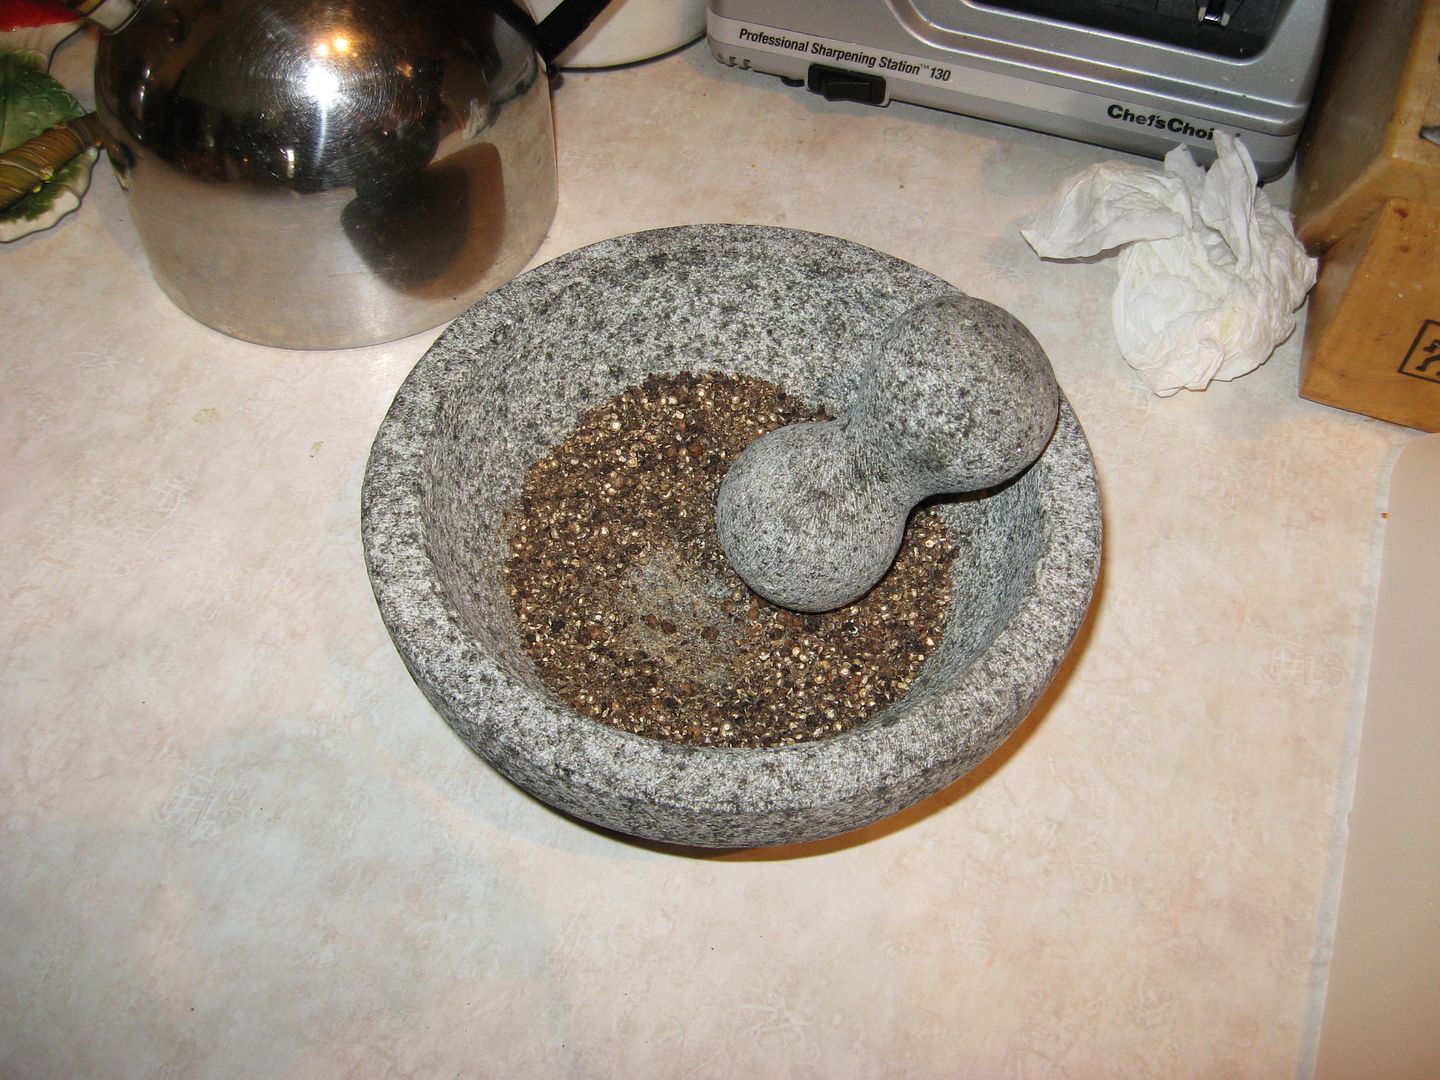
I took fresh Tellicherry pepper berries and worked them in the molcajete to a medium grind. A rounded teaspoon of berries is plenty for darn near anybody’s taste; be careful with adding the pepper, taste steadily so you don’t go uberbort! I ground extra to fill a shaker with for the next few days use, just ‘cause…
While the pasta water heated, I put a teaspoon of extra virgin olive oil in a sauté pan with 4 ounces of unsalted butter on medium-high heat. I browned the butter to a nice medium tone and then added roughly 1 teaspoon of ground pepper and ½ cup of pasta water and incorporated quickly.
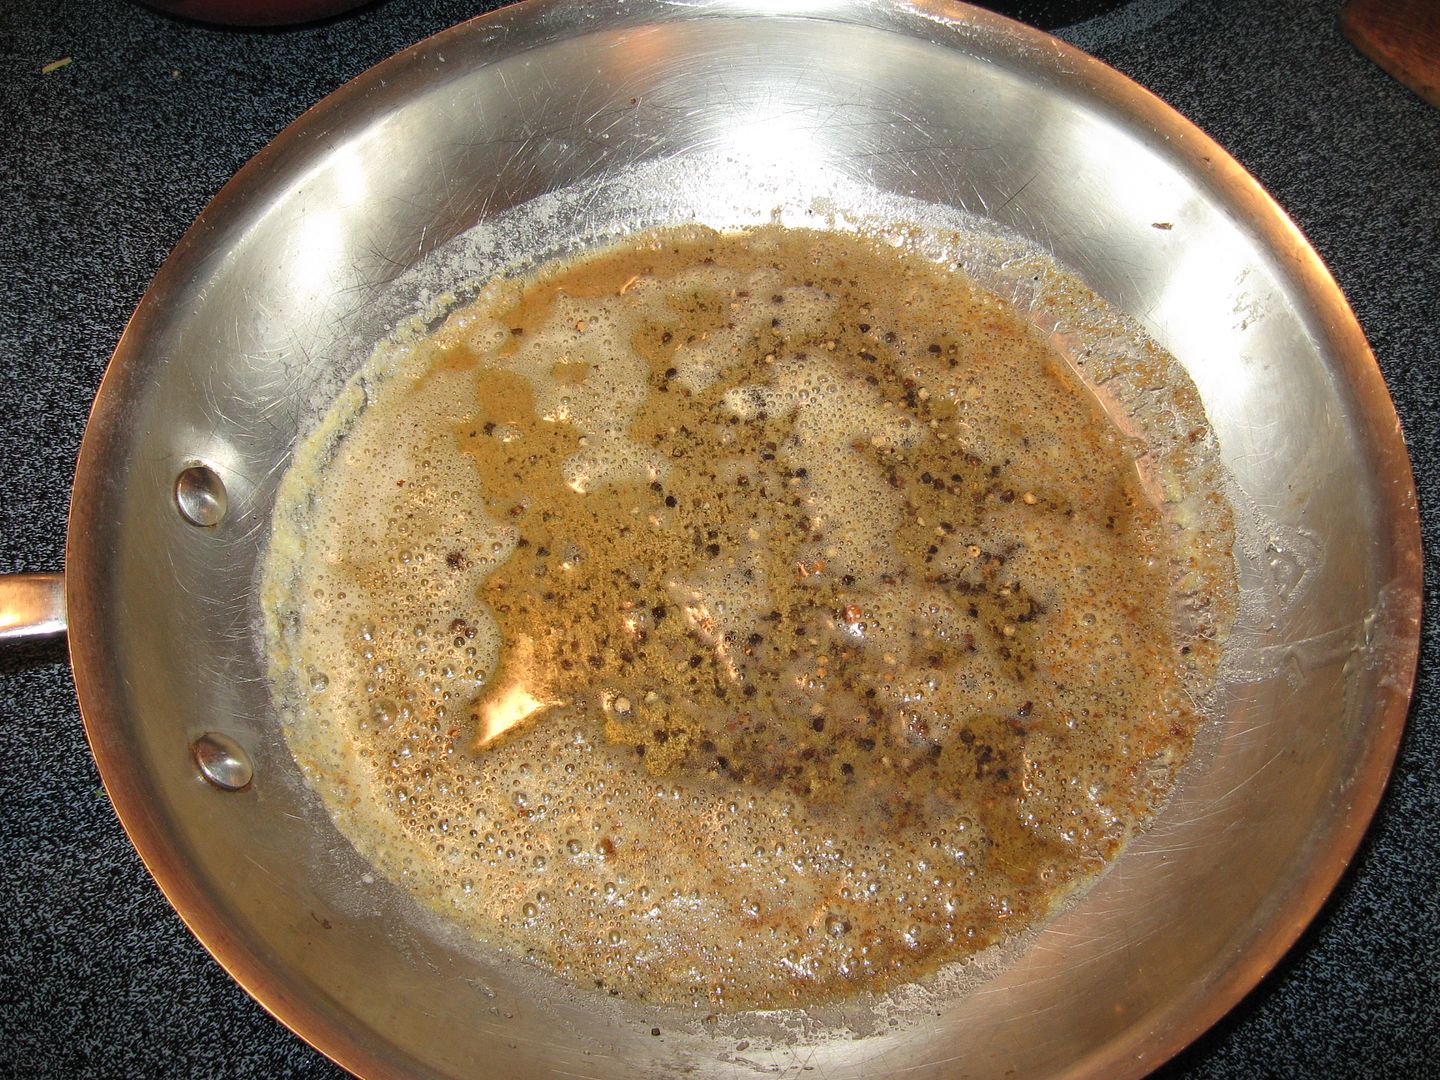
Add the pasta to the sauce and toss thoroughly; we did not add cheese to the sauce/pasta mixture until it was plated, but you can add and toss that as well if you prefer.
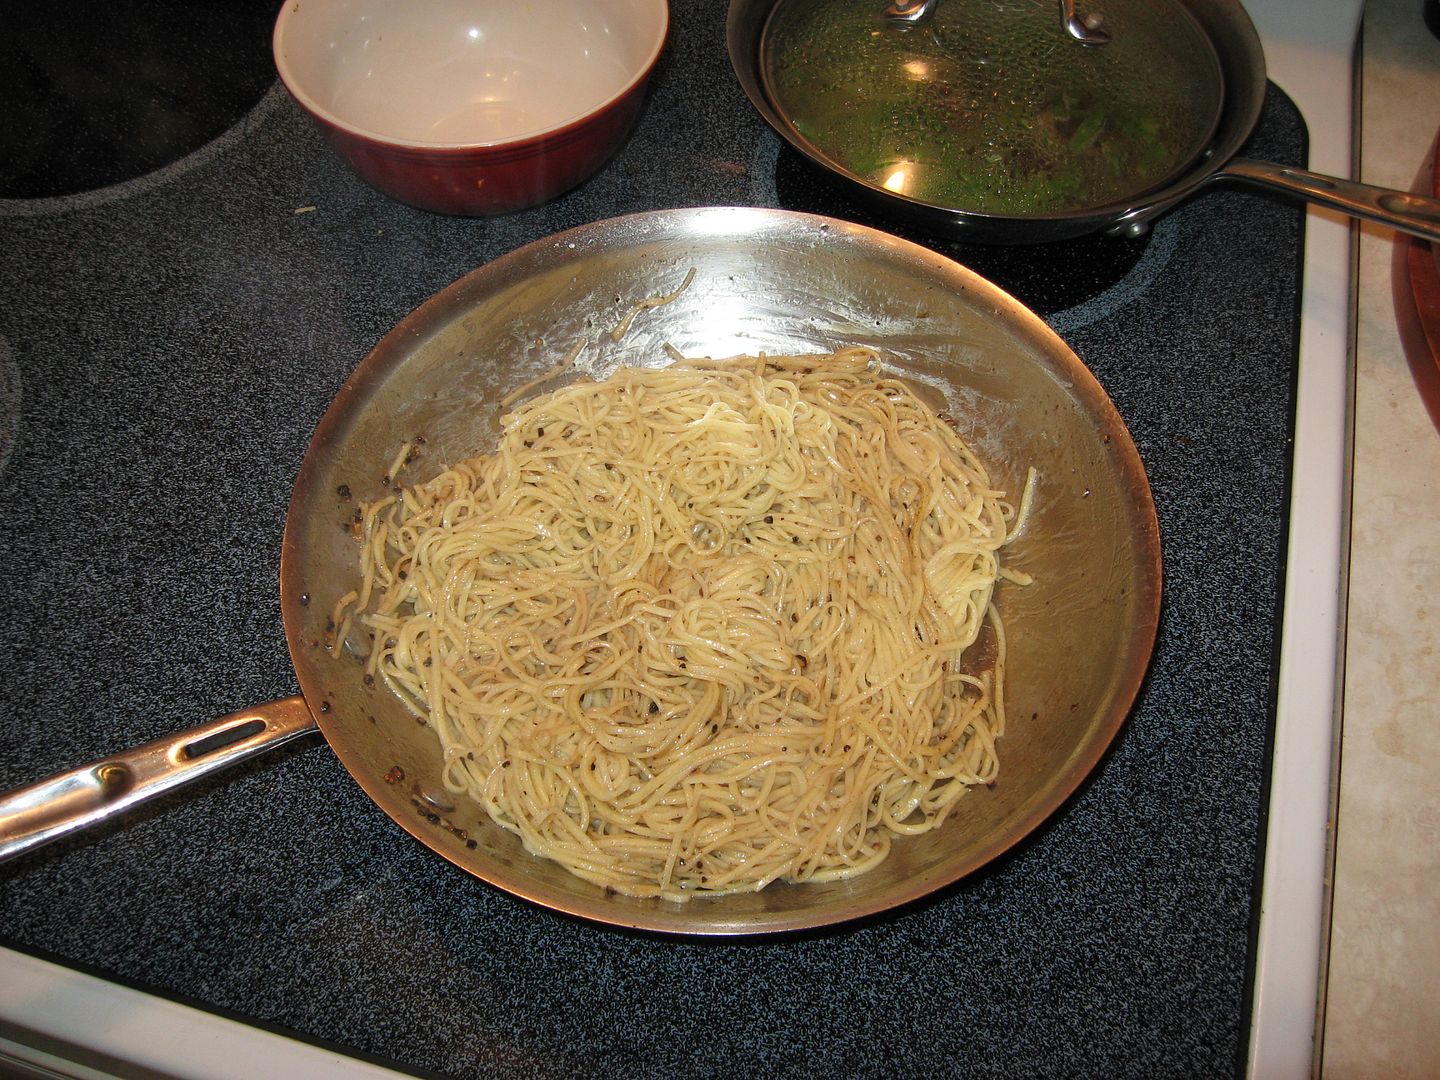
Load a generous portion of pasta into a cheese bowl, add haricots and garnish, (We used more cheese and fresh garlic chives from the garden) and serve right away!
The pasta was simply amazing; truly unbelievable the depth of flavor just from cheese, pepper and butter. Impossible to describe adequately, so y'all will just have to try it yourselves: As Mario likes to say, Buon Appetito!

2 comments:
That looks great. Great step by step instructions.
Your Pal,
Motorhead
Hey, thanks Buddy! I hope you found it properly inspirational!
Post a Comment